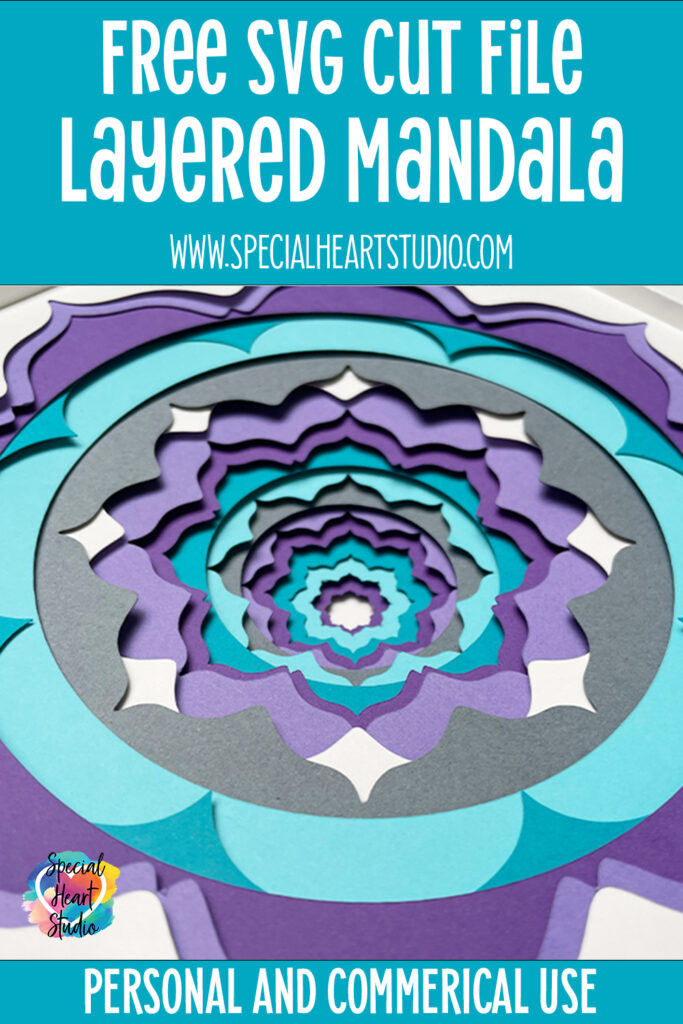
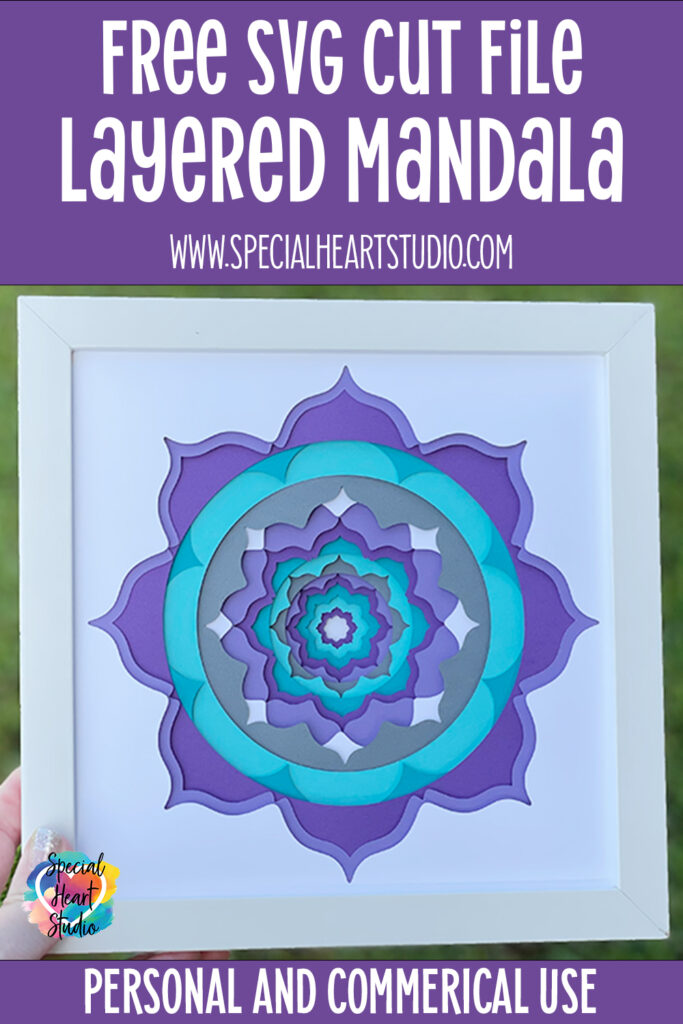
Easy Layered Mandala Art
This post may contain affiliate links. Please see my Privacy Policy for full details.
Creating layered mandalas is one of my favorite things to make with my Cricut. I’m always amazed how making a few cuts on paper can turn a project into an art masterpiece. Using the same design with different colors can really change the look and feel of these types of projects too.
If you’ve been intimidated by the more intricate mandalas, this design is for you! It has 18 layers but cuts quickly as there are no intricate areas. I cut all layers in 20 minutes. Quick and easy.

Materials Needed For Layered Mandala Art
- 65 lb Cardstock
- Foam tabs
- 8″x8″ Shadowbox Frame
- Brayer
- Light grip mat (Cricut blue mat)
- Cricut Maker – or your favorite cutting machine
- Design #145– Round Floral Layered Mandala SVG – The free cut file (available in my freebie vault—get the password at the bottom of this post).
How To Cut And Assemble Layered Mandala Art
Start by downloading and unzipping the free SVG from my Freebie Vault. This design can be found under #145. If you have not yet joined my email list, you’ll find a spot near the end of this post to sign up and access all the free cut files found here at Special Heart Studio. 💜
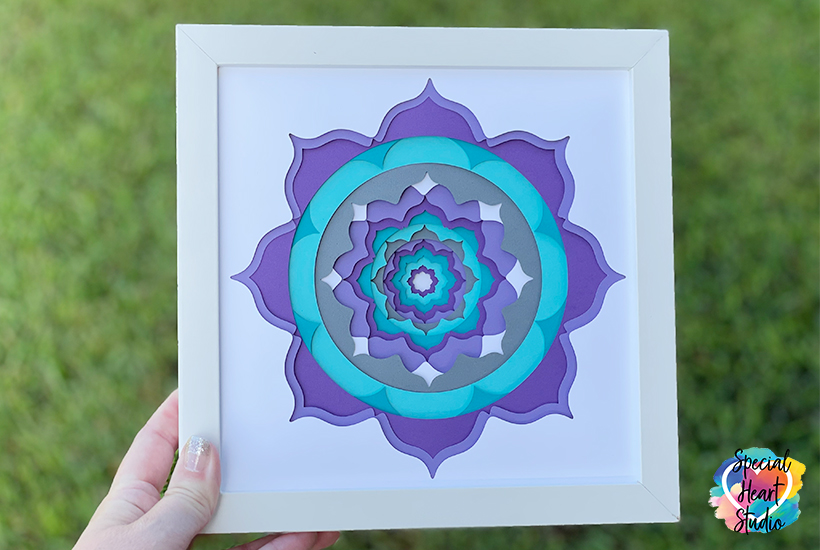
Once the design has been unzipped, upload it to Cricut Design Space or your cutting machine software. I set the mandala pictured at 7.55 inches so that it would fit in my 8×8″ shadowbox.
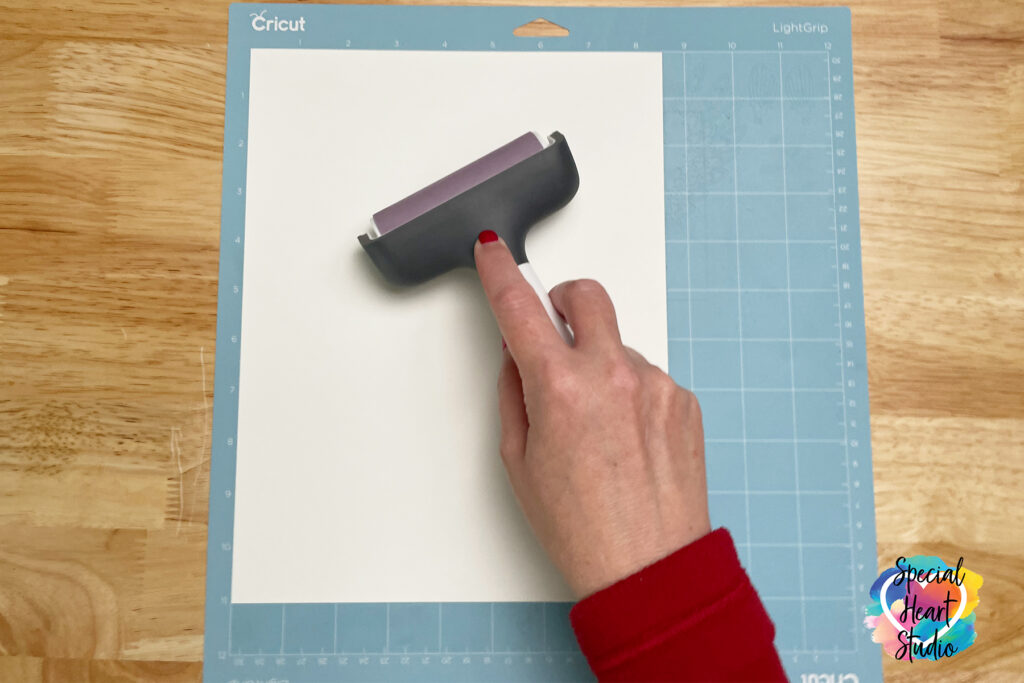
Once ready to cut, use a brayer to ensure the paper firmly adheres to your mat. This will greatly reduce tearing while the mandala cuts. I use Medium Cardstock setting with this Recollections 65lb. cardstock on my Maker. Machines do vary, so you may need to find the perfect setting for your machine.
Once cut, it’s time to remove the paper from the mat.
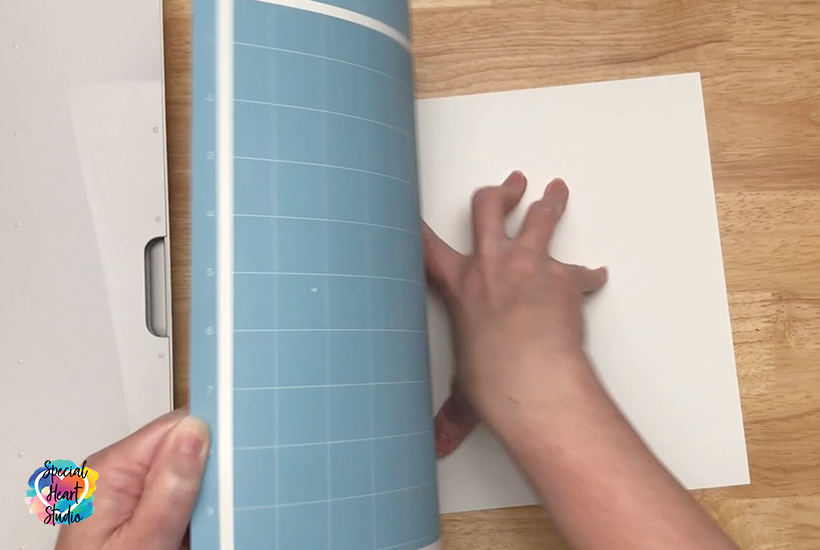
Turn the mat upside down so that the paper is on your work surface. Gently bend the mat away from the paper, keeping it as flat as possible to your table to prevent curling.
Once all layers have been cut, it’s time to assemble the Mandala Art.

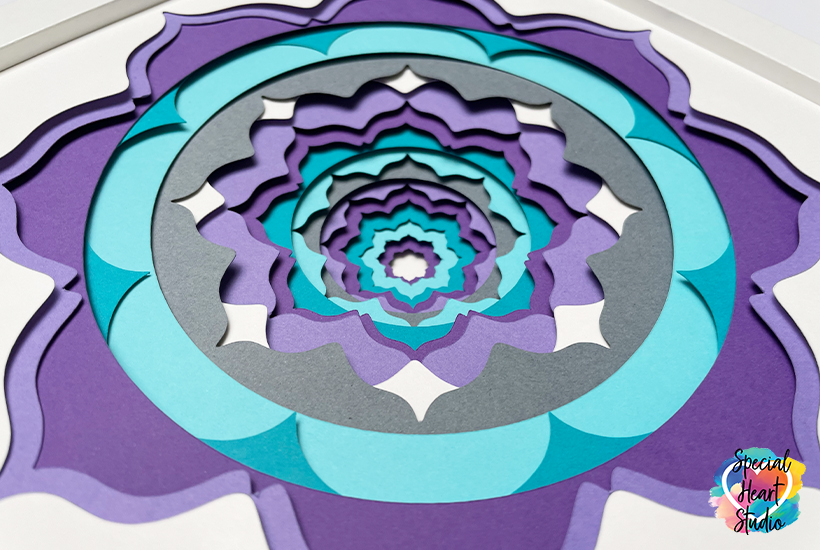
For the piece shown in this blog post, I used foam tabs to provide separation between each layer. This is optional as this design looks great, just stacked flat too. One thing to note – because this design has 18 layers, you may need to use thinner foam tabs to ensure the thickness of your completed mandala will fit in your frame.
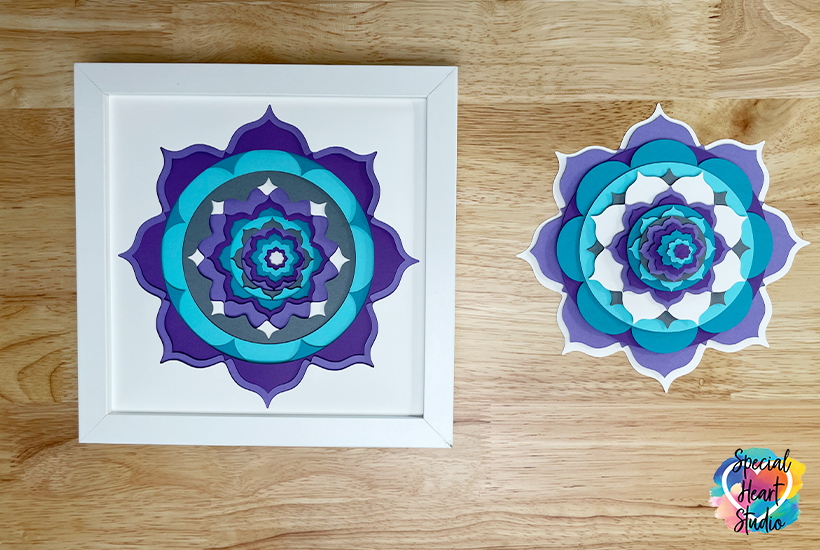
Fun tip. I stacked the negative pieces and attached them with foam tabs too. I plan to frame this piece and hang them together. Just have to get another frame. 🙂
Please Share Prior To Downloading
Please share! If you enjoy this project/design would you please share it on your social media platform or on your favorite Pinterest board? I greatly appreciate it!! That helps my blog continue to grow and enables me to continue to provide free designs. 💕 Thank you!
Download My Latest FREE Layered Mandala SVG By Subscribing Below To Get The Password To My Freebie Vault
DOWNLOAD the Round Floral Layered Mandala SVG – Design #145 by entering the password to my Freebie Vault. Click HERE to go to the freebie vault, my library of free downloads. To sign up for a password to my free designs, enter your name and email address below. ⬇️
I can’t wait to try this one, with both the sets of cuts. I love your designs, they’ve really helped me grow as a newbie. Thank you! Also congratulations on the blessing of a new grandchild!!!
Thank you so much.
Thank you again Gjoa for another beautiful gift. Your mandalas and your other files are beautiful and the two I have made for friends are much loved. Keep up your great work and bless you.
I’m so happy you like them.
Thank you for the mandala svg. It’s simplicity makes it so pretty. I am envisioning it in so many color combinations, and seasonal themes. Congratulations on your new granddaughter. Thank you again for providing us with your creativity and sharing. TJ (Trudy)
Thank you. 😊
Thank you SO much! I love your work
It’s truly my pleasure. Enjoy!
This is Beautiful Thanks You For Sharing
You’re welcome.
A very pretty design. I can’t wait to make!
Thank you very much!
Angela
You’re welcome.
Thank you for sharing your beautiful mandala design, and congratulations on your new granddaughter. Enjoy them while they are little, they grow up fast.
Thank you!