HOW TO USE GRUNGE EFFECTS WITH CRICUT AND SILHOUETTE
This post may contain affiliate links. Please see my Privacy Policy for full details.
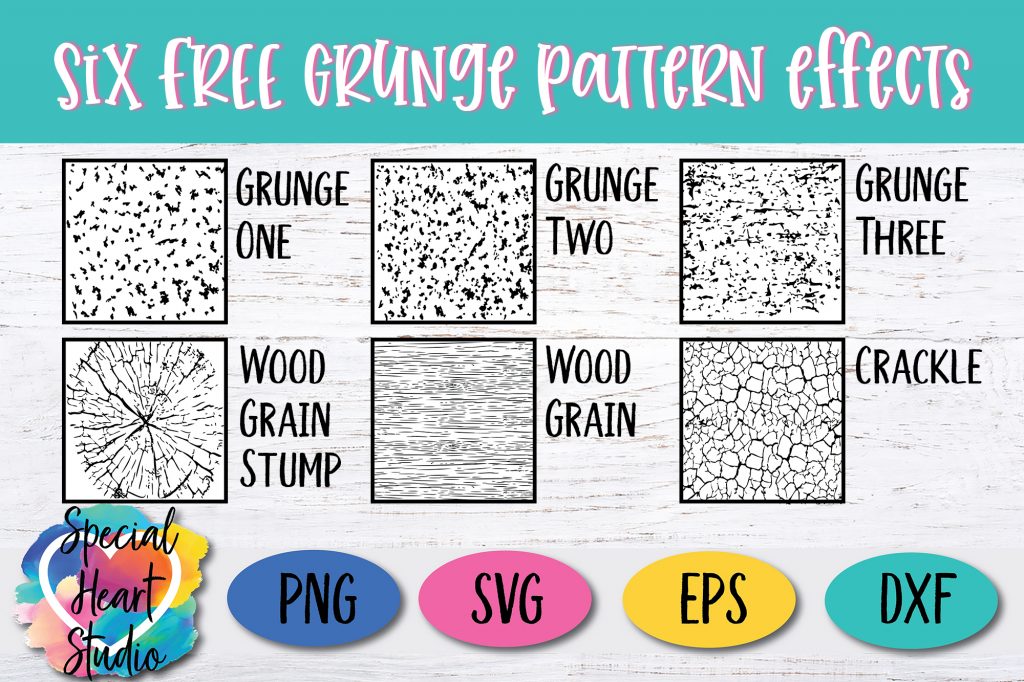
Have you ever wanted to create a grunge look with vinyl? This tutorial will walk through how to use grunge effects for both Cricut and Silhouette users. Included in this post are six free grunge effects to add character to your projects.
The next few photos will walk step by step through the process. There is also a video below for those who prefer to watch each step.

FREE GRUNGE TEXTURE SVG CUT FILE
- Design #81 – Six Grunge Textures– Free SVG cut file (available in my freebie vault—get the password at the bottom of this post).
CRICUT DESIGN SPACE – HOW TO USE GRUNGE TEXTURES
Type the word or make a shape that you would like the grunge pattern applied to. You may also upload an SVG design.
Upload the SVG format of the grunge pattern. Once your object and pattern are in Design Space, you’re ready to get started.
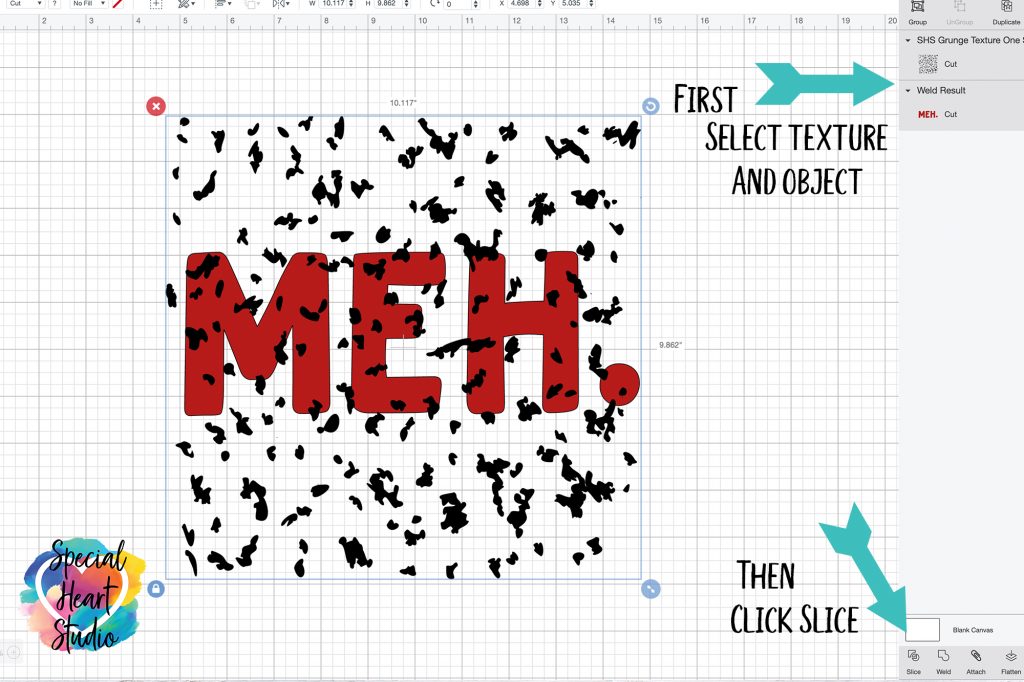
The first step is to select both the object you’re adding the grunge to, along with the grunge pattern. Then click slice.
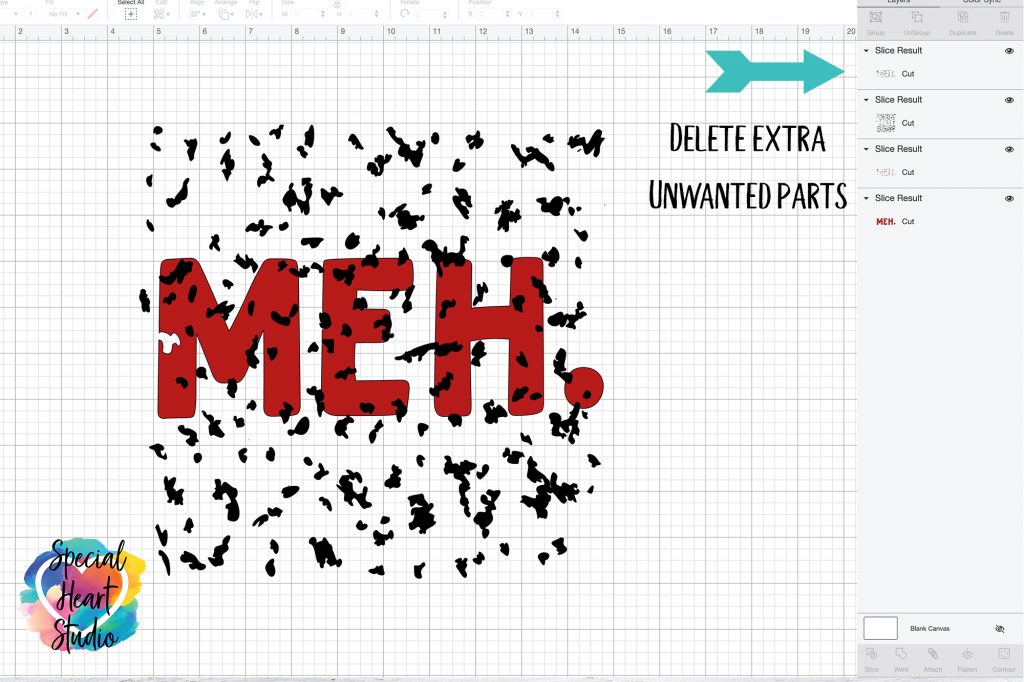
Because Design Space doesn’t know which parts you’re wanting removed, it leaves all the parts sliced. You’ll now need to delete the parts that you do not want left in your design. Select each unwanted part and click delete.
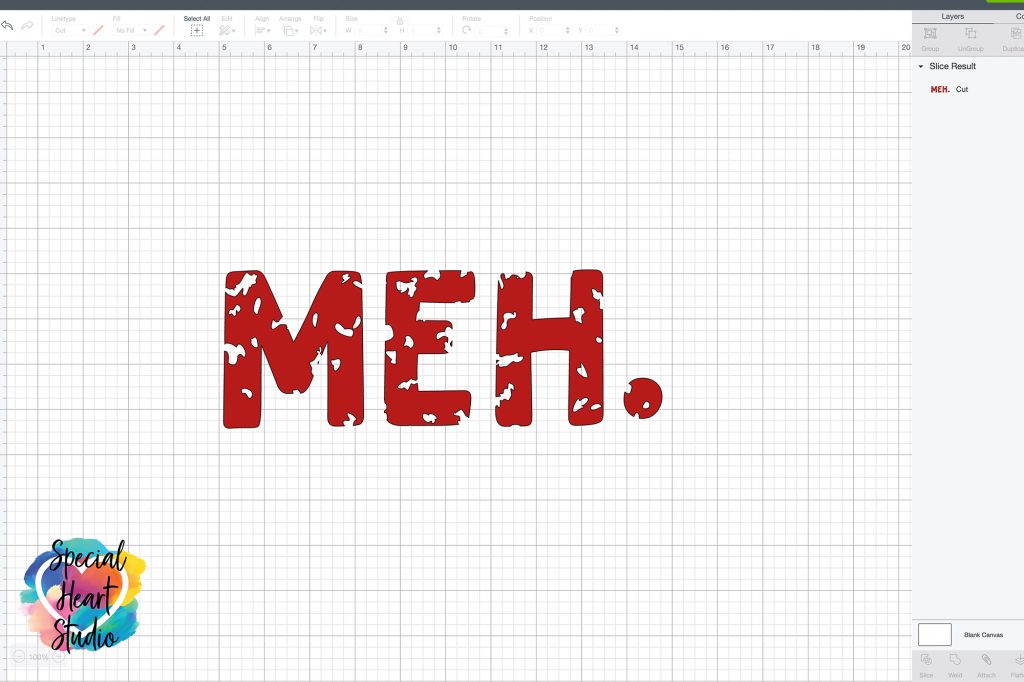
That’s it! Remember when using grunge patterns, the smaller and more detailed the pattern, the longer it will take to cut and more difficult the weeding process will be.
For details on how to apply grunge to multiple colors in Cricut Design Space, please refer to the video below.
SILHOUETTE STUDIO – HOW TO USE GRUNGE TEXTURES
The process to apply grunge in Silhouette Studio is similar to Cricut, although easier when multiple colors are involved.
In order to use SVG formatted files with Silhouette, a user needs to have the Designer Edition or higher version of Studio. I’ve found that Swing Design has the best price on Studio upgrades.
Type the word or create the shape where you’re wanting the grunge applied. Also upload the grunge SVG pattern to the same mat.
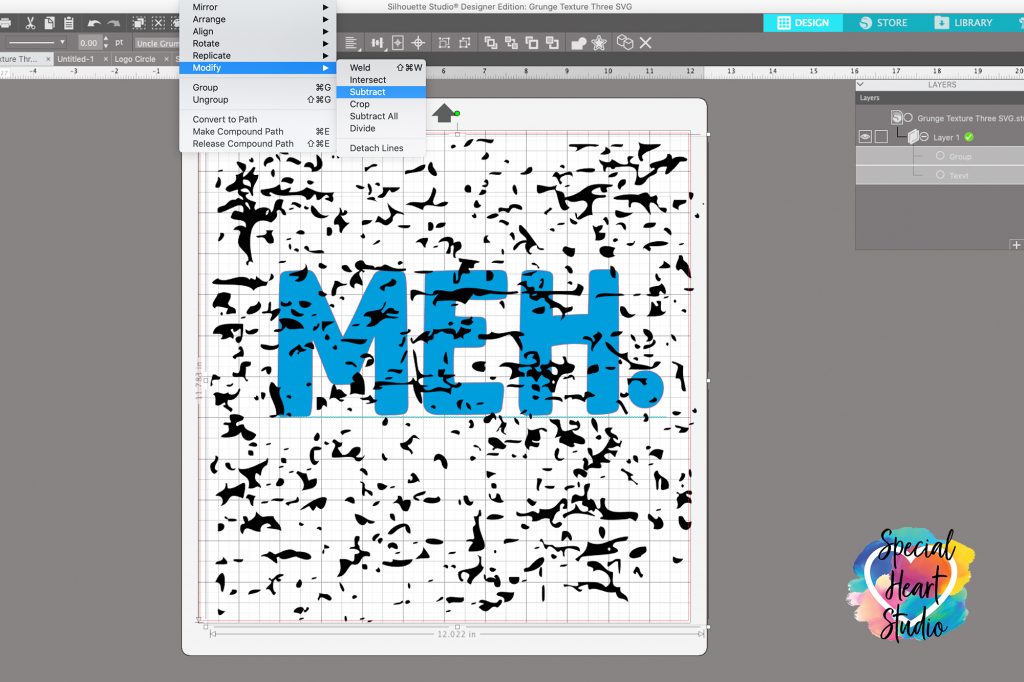
Once you have your shape or text ready in Studio, place the grunge SVG texture on top of your object.
You’ll then go to Object>Modify>Subtract.
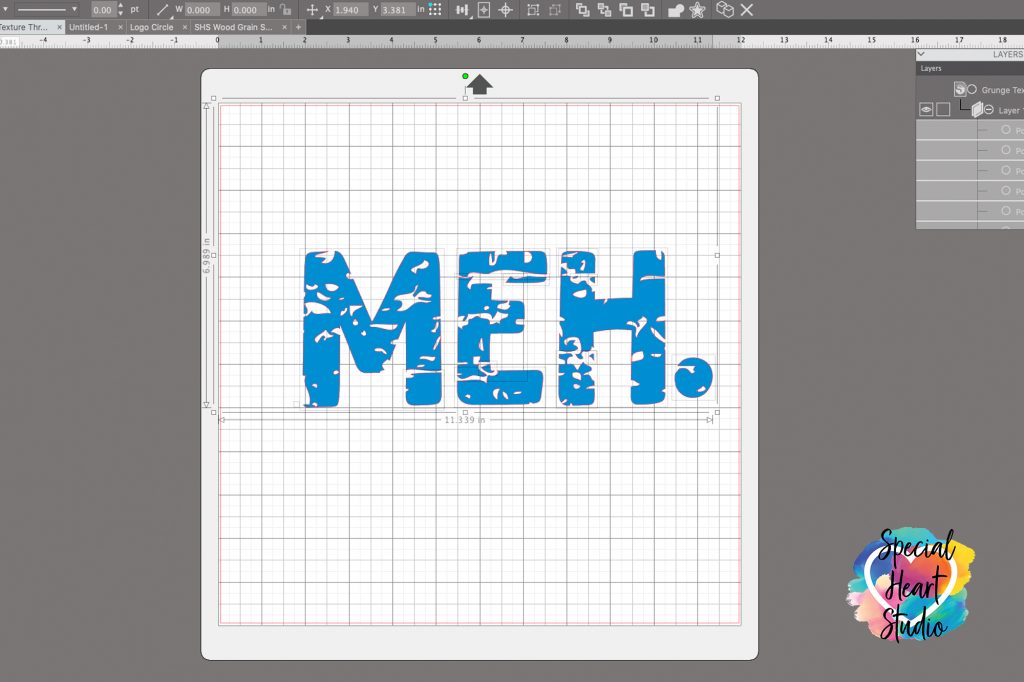
That’s it! You can add to your design, or send it to cut from this point.
Remember, the smaller and closer together your grunge pattern, the longer to cut and harder to weed.
VIDEO TUTORIAL – HOW TO USE GRUNGE TEXTURES
This short video will walk through the steps outlined above in more detail. The video covers both Cricut Design Space and Silhouette Studio
PLEASE SHARE PRIOR TO DOWNLOADING
Please help us by sharing it before downloading the design. If you like these free designs, please take a moment to share on your favorite social media or pin it on Pinterest. That helps our site continue to grow so that we can continue to provide free content. Thank you! 💜
DOWNLOAD THE GRUNGE TEXTURE SVG CUT FILES BY SUBSCRIBING (FREE) BELOW TO GET THE PASSWORD TO MY FREEBIE VAULT
New to Cricut and need help on how to upload these designs to your Cricut machine? My How to Upload SVG Files In Cricut Design Space post will provide step by step directions how-to upload SVGs to Design Space.
Hi I watched the video on how to do the grunde files. I just have on question about the multi layered. When I duplicate the grunde file then it looks like you click something on the top to stack them. It looks like your hitting align. There is no stack button, what do I hit.
Hi Nancy,
Yes, I use the “center” align function. You have to select all the layers you want to align in order for the button to function.