How To Make A Layered Christmas Shadowbox
This post may contain affiliate links. Please see my Privacy Policy for full details.

As I write this post, Christmas is two weeks away. It’s hard to imagine as time seems to go faster each year. This evening, my daughter and I are attending a small Christmas gathering. I love making handmade gifts to take to a party hostess and figured I’d share my design too.
The design consists of eight layers. Follow the directions below to see how I assembled the layers. I hope you enjoy this project. ❤️
- Cardstock – I used a mix of 65lb. and 80lb. as I wanted the greens to be different and it’s what I had on hand. The gold layer is linked here. It’s Clear Path Paper on Amazon – a favorite of mine.
- Foam Tape – For this project, I used two different sizes. 1/8 inch and 1/2 inch.
- Art Glitter Glue – This glue is perfect for paper projects.
- 9×9″ Shadowbox Frame – Belmont from Michaels
- Light grip mat (blue light grip) – I used a well-used green mat on this project. Normally with cardstock I use a blue mat.
- Brayer
- Cricut Maker – or your favorite cutting machine.
- Design #152 – Layered Merry Christmas Shadowbox – My free cut file (available in my freebie vault—get the password at the bottom of this post).
Step-By-Step Directions For A Layered Shadowbox
After you’ve downloaded the Layered Christmas Shadowbox design from the freebie vault, unzip and upload the design to Cricut Design Space.
New to Design Space and looking for help with how to upload? Click HERE to find directions to get started.

Once uploaded, we need to decide how big to cut the design. I used a 9″x9″ shadowbox that I picked up at Michael’s.
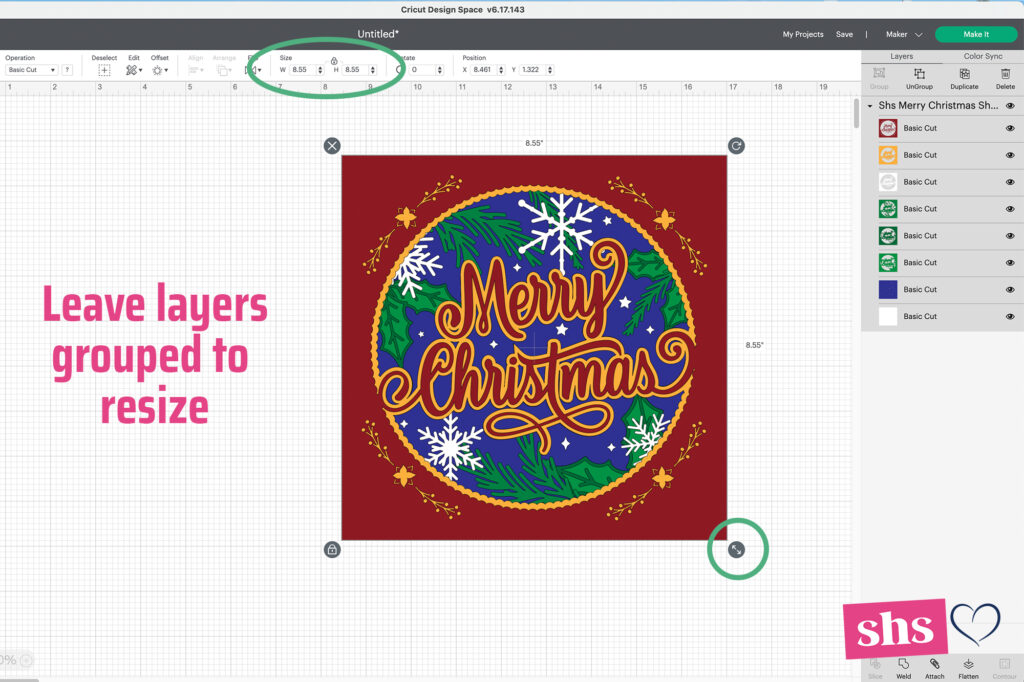
The design should upload at 8.55″. That is the size I used in the 9″x9″ shadowbox. If you need to resize the file, leave the layers grouped and drag the bottom left corner up/down or type in the exact measurement in the top toolbar (as circled).
After selecting your size, there’s nothing else that needs to be done for this design. You can change the color of the layers if you want to see how it would look with your paper. From here, you’re ready to “Make It”.

The numbers two through six will be cut on the middle layers. This will make it easier to ensure all pieces are in the correct order when assembling the project.

Once each layer has cut, place the mat with the paper face down on your work surface. Gently bend the mat back while keeping the paper as flat as possible to prevent curling.
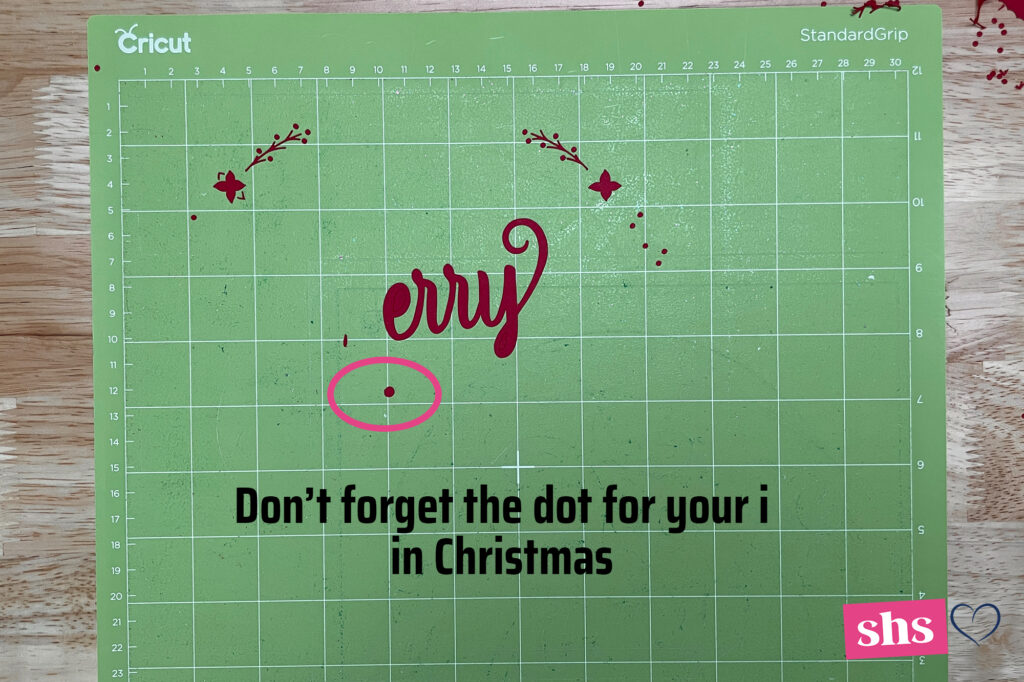
Pro tip: Don’t be like me and scrape the dot to the “I” in Christmas off your mat. You may have to dig for it if you do. There should be four pieces to the top layer.
Once all layers have been cut, it’s time to start assembling.
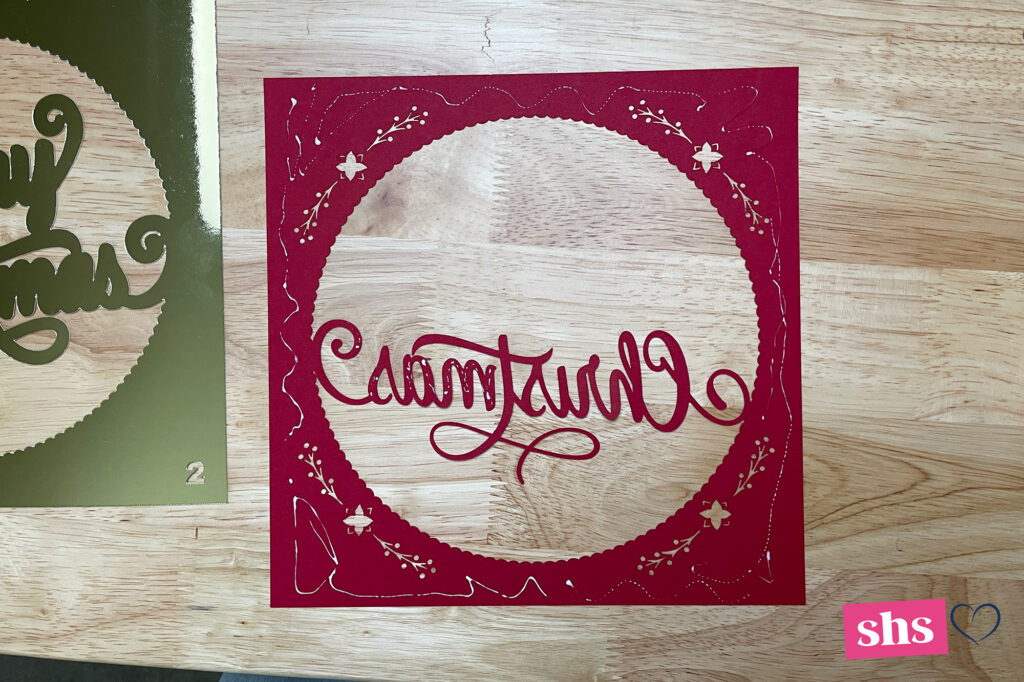
I started by gluing the main portion of the top layer to the second layer. Just a tiny bit of Art Glitter Glue will hold the paper and keep it from wrinkling.
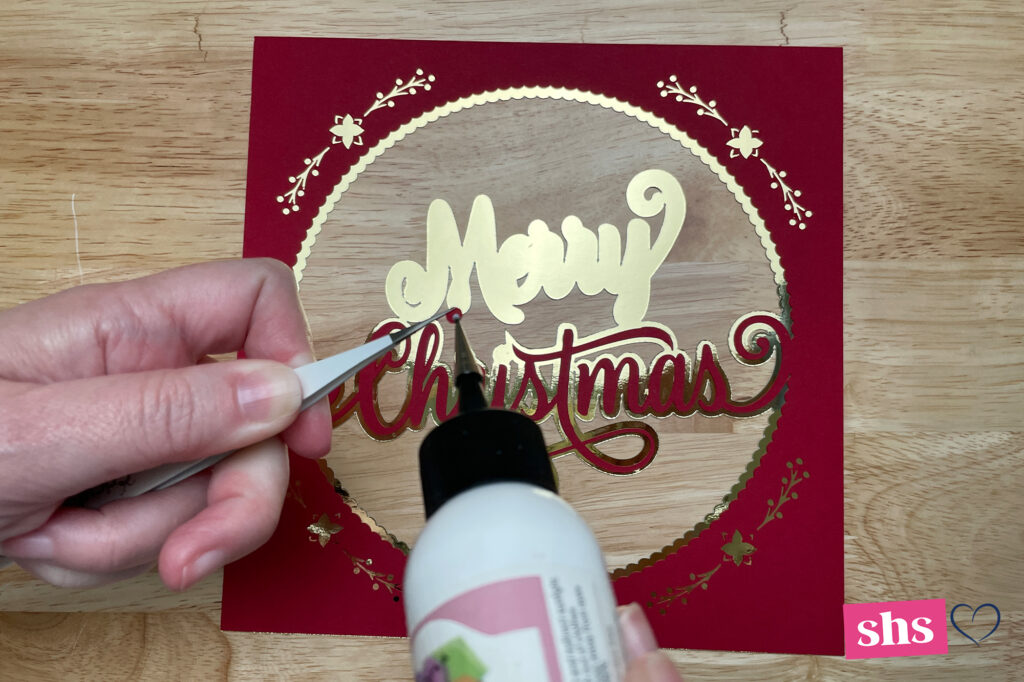
Next, turn it over and glue the dot, M and erry to the front.
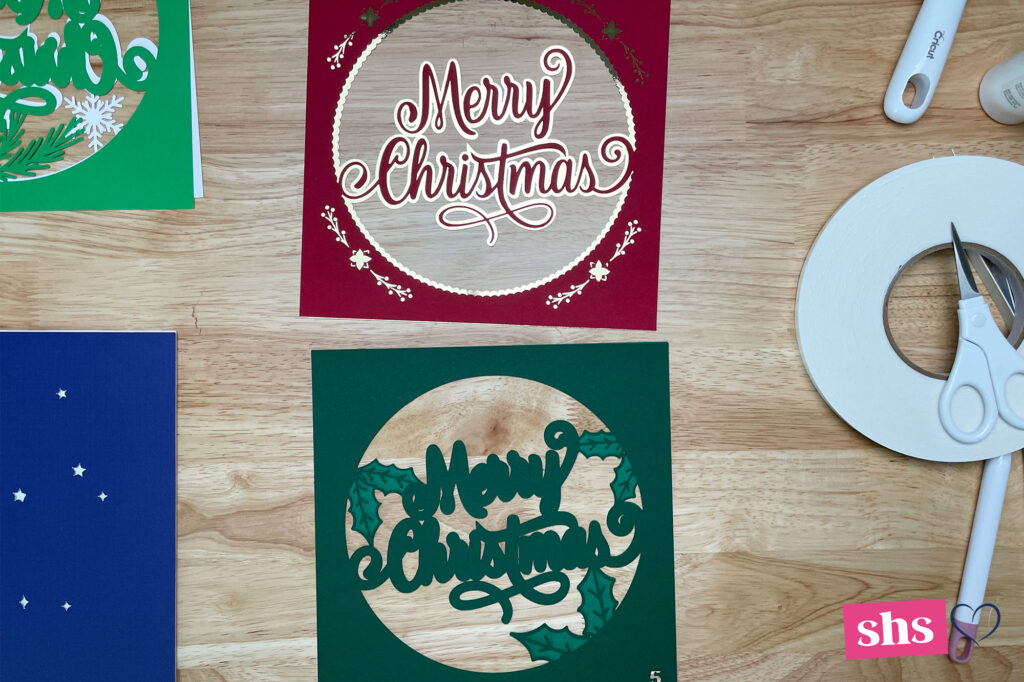
I also glued layers five and six together with Art Glitter Glue.

Now, we’ll focus our attention from the bottom up. I used foam tape between the bottom piece and also between the fifth/sixth (already glued) and seventh layers. See above how the tape was placed. Make sure to use enough the paper won’t bow in or out.
Carefully place the sixth layer onto the star layer. Taking time to line up will result in a clean look when finished.
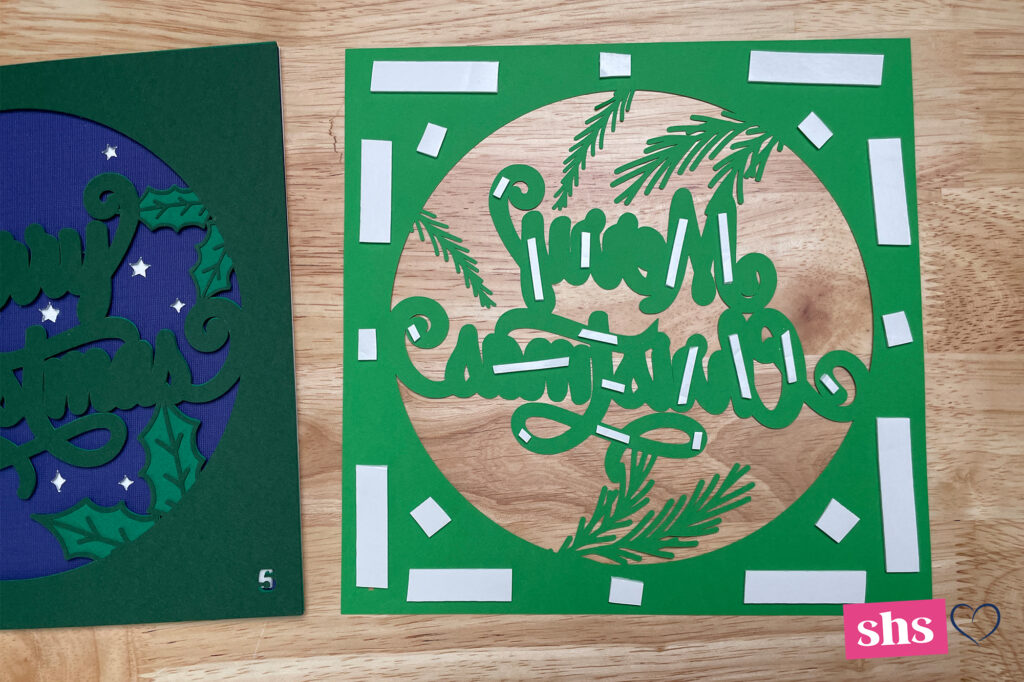
Repeat the foam tape on the back of the fourth layer. Then carefully stack on the fifth.

Foam tape was used between the third and fourth layers.
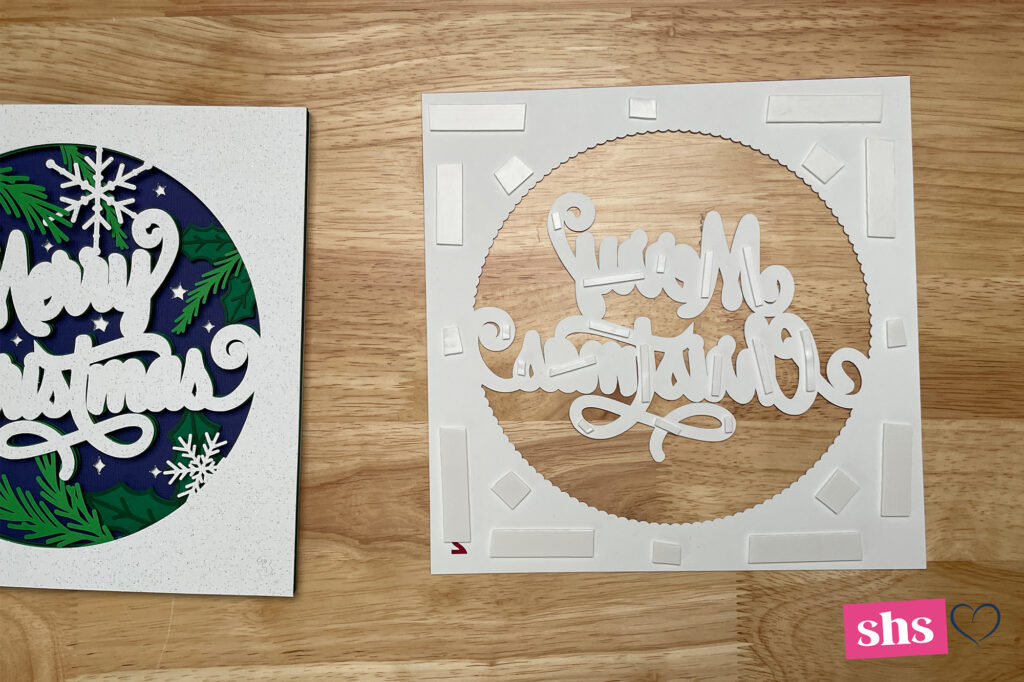
We’re now down to the first and second layers that we previously glued together. Add foam tape to the back of the second layer, and stack it on top of the third. Note: After I placed the snowflake layer, I gently pulled the pine needles above Merry in front of the snowflake for dimension.
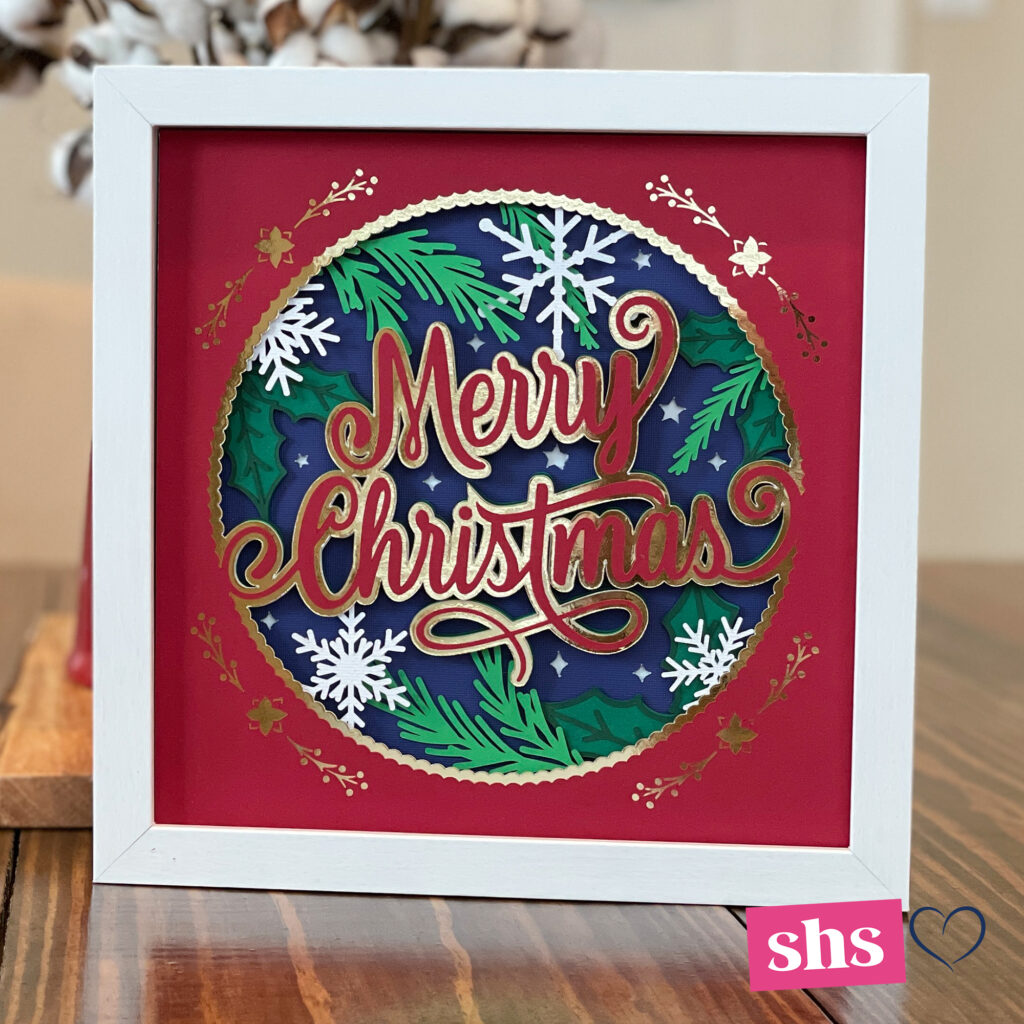
Insert all the layers in a frame. I love how the design turned out. Perfect for gifting or as decoration in your home.
Font information: The gorgeous font used in this design can be found HERE.
I also have a paper shadowbox frame SVG that could be used for this project. To find that post, click HERE.
Please Share Prior To Downloading
Please share! If you enjoy this project/design, please share it on your social media platform or your favorite Pinterest board. I greatly appreciate it!! That helps my blog continue to grow and enables me to continue to provide free designs. 💕 Thank you!
Download Layered Christmas Shadowbox Design By Subscribing Below To Get The Password To My Freebie Vault
DOWNLOAD the Layered Christmas Shadowbox SVG/DXF/EPS/PNG– Design #152 by entering the password to my Freebie Vault. Click HERE to go to the freebie vault, my library of free downloads. To sign up for a password to my free designs, enter your name and email address below. ⬇️


Another awesome creation.You surely do use your God given talent.
Thanks so much
Christmas Blessings Jocelan
Thank you! Merry Christmas
Wow, Indeed! Beautiful – can’t wait to make it!! Thank you for such a magical pattern!
Thank you for the great file! I love the gold layer to give the project the extra shine for the holidays. 🙂
Thanks! Yes, the gold really gives it the wow factor.
Oh my gosh! You are right! OH WOW! Love it! Thank you so much for sharing your beautiful designs!
You’re welcome.
Awesome as always. Thanks so much for sharing all your hard work.
Thank you! Your new design is gorgeous, I hope to get a chance to make it soon! Merry Christmas.
This is beautiful! Thanks for sharing.
Absolutely gorgeous! I look forward to making it, but it will be after this Christmas. Thank you!
Enjoy! Merry Christmas
Merry Christmas to you and yours…. Thank you so much for this new Mandala for Christmas . It is beautiful and your instructions photos and details are just amazing on how to be successful in making these. Yours were the first I ever tried and I am convinced that because of your detailed step by step and photo instructions that I love to do these layered creations and that I am successful as are others.
Thank you again….
I’m so happy the directions helped. Merry Christmas!
A beautiful project. Thank you for sharing.
beautiful !!!!! thank you
Thank you!
Vielen Dank für die tolle Datei
Thank you love it so much!
Thank you so much for the layered Christmas message. I can’t wait to try it. Very generous of you!!
It’s truly my pleasure.❤️
What a beautiful layered design. So pretty. Thank you for sharing.
Thank You for sharing this beautiful design 💜 ❤ Merry Christmas 🎅 🎄 to You & Your Family