Easy Gift Card Holders – Free SVG Cut File
This post may contain affiliate links. Please see my Privacy Policy for full details.

Christmas is just one short week away. Ekkk!
Maybe you’re like me and haven’t finished shopping. Or have kids who’ve asked for cash or gift cards. If that’s the case, grab these fun and easy gift/money card holders.
Even if you don’t need a gift card holder, the Santa is adorable and makes such a cute gift tag or ornament too.

Materials Needed to Making A Gift Card Holder
- Cardstock – I used a mix of 65lb. and scraps from previous projects.
- Foam Tabs
- Art Glitter Glue – This glue is perfect for paper projects.
- Light grip mat (blue light grip) – I used a well used green mat on this project. Normally with cardstock I use a blue mat.
- Brayer
- Cricut Maker – or your favorite cutting machine.
- Design #153 – Gift Card Holders SVG – My free cut file (available in my freebie vault—get the password at the bottom of this post).
Step-By-Step Directions for the Santa Gift Card Holder
Download the Gift Card Holder SVG design from the freebie vault, unzip and upload the design to Cricut Design Space.
New to Cricut and need help on how to upload these designs to your Cricut machine? My How to Upload SVG Files In Cricut Design Space post will provide step-by-step directions on how-to upload SVGs to Design Space.
The Santa design was saved with a dashed line that can be used either as a score line or cut as perforations.

Once both parts of the SVG have been uploaded and ungrouped, we’ll need to fix the score/cut lines and attach them. Select the piece you want to use. The “flap” design is for cash and the smaller red insert is for a gift card. To change the perforated line to score, use the operation drop-down box.

Next, select the entire group, including the red piece, the little ( ) flaps to hold the cash, and the scoreline, and click “Attach”. If you’re using perforated cut lines, you’ll still need to attach these pieces.

For the gift card insert, select the red piece and the ( ), then click attach. That will have the little holder tabs cut from the paper.

The last piece to focus on is the outside sleeve. Once again choose if you’d like to use the perforated cuts, or change the line to score. Then click “Attach”.
Choose the appropriate setting for your machine based on your paper. I use the Light Cardstock setting on my Maker for 65lb. cardstock. It’s always good to do a test cut.
Assemble Santa

The second layer of Santa will be cut with a few slits in the paper. This is to show where the face piece should be glued.

I glued the face, red hat, and the swirly portion of the beard directly to the Santa base using Art Glitter Glue.

To determine the correct placement of Santa’s rosy cheeks, line up the mustache so the middle sits right at the top of the center swirl. Then use a pencil to put a little dot at the top of the mustache. This is where you’ll glue the ovals for the cheeks. Remove the mustache and glue the cheeks on top of the dots.

To complete Santa, use a foam tab on the two white hat pieces, mustache, and to attach Santa to the background. I used a Sharpie to add his “eyes” with two simple dots.
Assemble The Gift Card Sleeve
Next, we’ll focus on the gift/cash card sleeve.

Make three folds on the inside (cash) sleeve piece. Then glue the flaps and hold until dry.

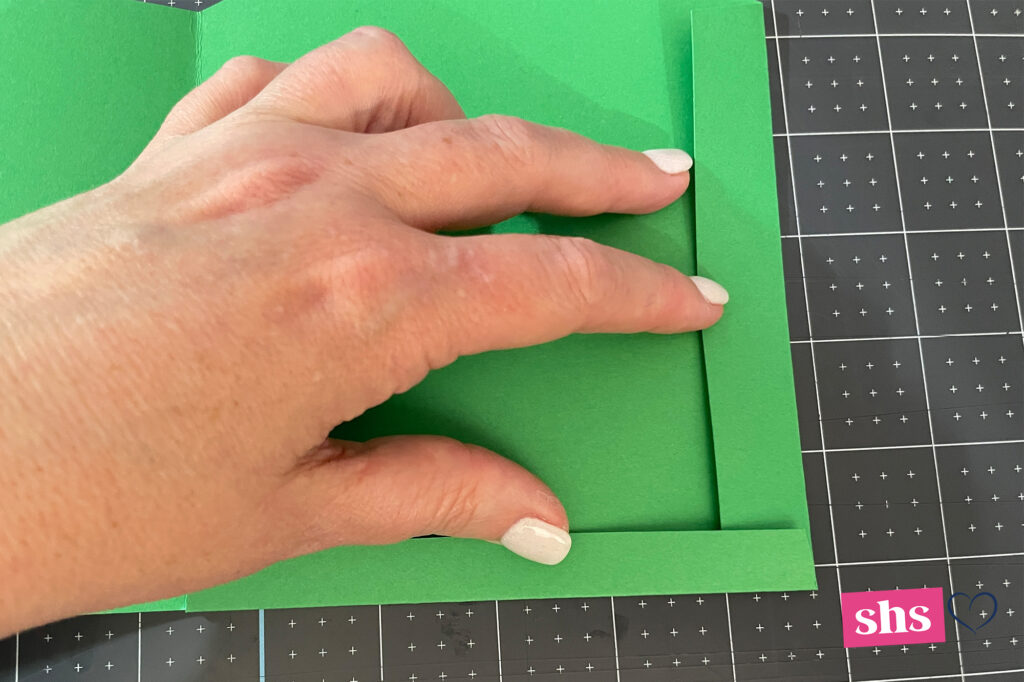
The outside sleeve of the holder also has three folds. Place glue on the two small tabs and fold the front over. Hold until dry. Then you can insert the holder into the sleeve.

I used a few small Zots to attach Santa to the sleeve so that it could be removed and used as a decoration.
The smaller gift card holder is simple and self-explanatory. It was designed only with a perforation so that Cricut Joy users can also make it. Glue the decorative pieces and tie it with a ribbon or string.
Please Share Prior To Downloading
Please share! If you enjoy this project/design would you please share it on your social media platform or on your favorite Pinterest board? I greatly appreciate it!! That helps my blog continue to grow and enables me to continue to provide free designs. 💕 Thank you!

Download Gift Card Holder SVG Files By Subscribing Below To Get The Password To My Freebie Vault
DOWNLOAD the Gift Card Holder SVG – Design #153 by entering the password to my Freebie Vault. Click HERE to go to the freebie vault, my library of free downloads. To sign up for a password to my free designs, enter your name and email address below. ⬇️


Thank you for this freebie! It is so cute. I will use your suggestion and use up my scrap pieces.
Enjoy! Merry Christmas
Thanks for another cute cut file.I would like to wish you and your family a very Merry Christmas.
Blessings Jocelan
Thank you! Merry Christmas
Thank you for the adorable Santa gift card holder. I needed something for those last minute gift cards this week and the ones at the stores are so expensive and not nearly as cute.
Merry Christmas and a very blessed and Happy New Year! 🙂
Merry Christmas to you and yours too!