Layered Easter Bunny And Egg Cut File
This post may contain affiliate links. Please see my Privacy Policy for full details.
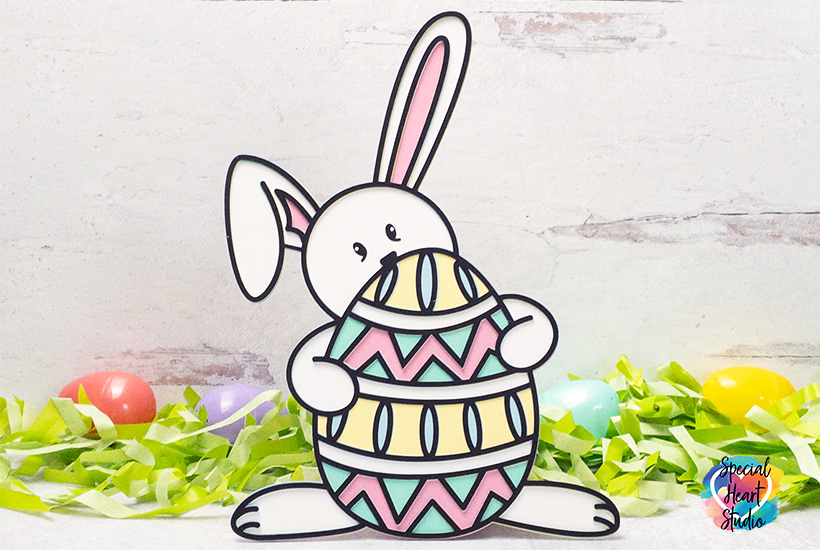
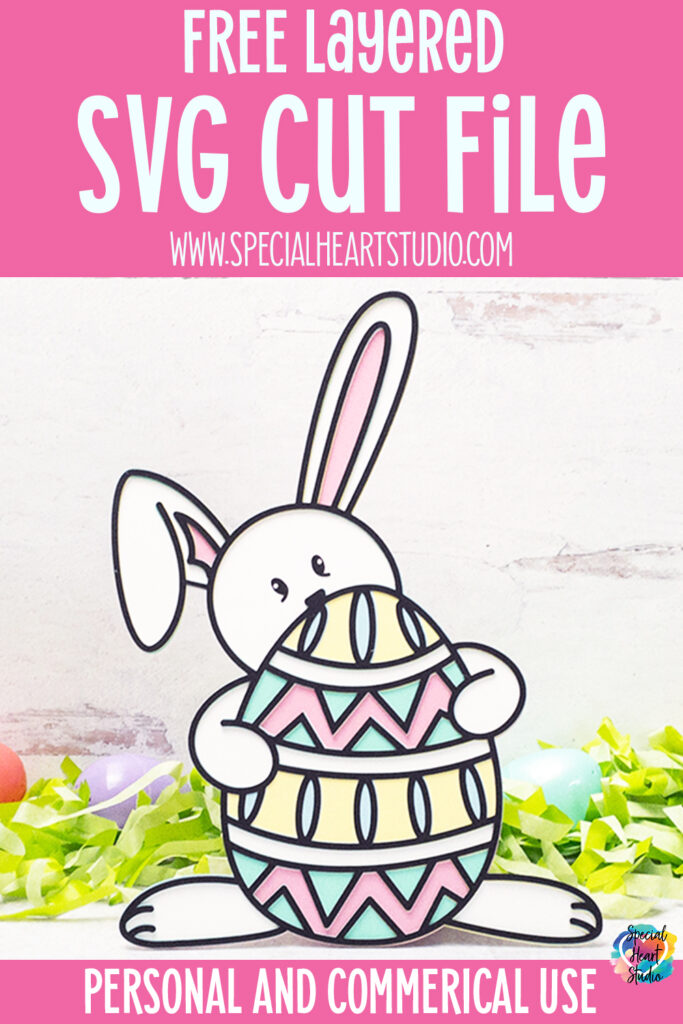
Ready for spring and Easter? This fun new layered design will certainly help with your Easter projects or decorations. I love to decorate my entryway with fun holiday or seasonal decor, and have to admit, this little guy is the first thing that will go up as soon as Valentine’s is over.
This design has six layers and has been saved in SVG, DXF, EPS, and PNG formats.
I don’t mind if you use these designs for personal or small business commercial use up to 200 items, but please do not re-sell or re-distribute the files. I’d ask that you direct your crafty friends here to download the files themselves. Also, I don’t allow my designs to be used in print-on-demand shops or on transfers that will be sold. Click HERE for complete Terms of Service.
In the steps below, I outuline how you can make your own Layered Bunny in Cricut Design Space. The cut file can also be used with Silhouette, Brother Scan N Cut and other electronic cutting machines.
Materials Needed For Layered Easter Bunny
- 65lb. cardstock
- Spray adhesive glue
- Art Glitter Glue – This is my favorite liquid adhesive glue (there’s no glitter in it).
- Brayer
- Light grip mat (blue)
- Cricut Maker – or your favorite cutting machine
- Design #126 – Layered Bunny Egg SVG/DXF/EPS/PNG – My free cut file (available in my freebie vault—get the password at the bottom of this post).
Instructions How To Cut and Assemble the Layered Bunny Egg
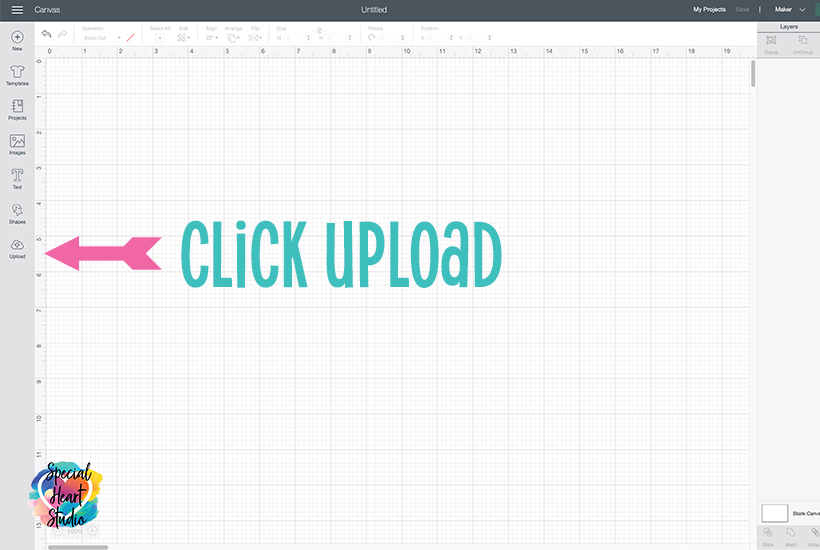
With Cricut Design Space open on a new Canvas, click upload.
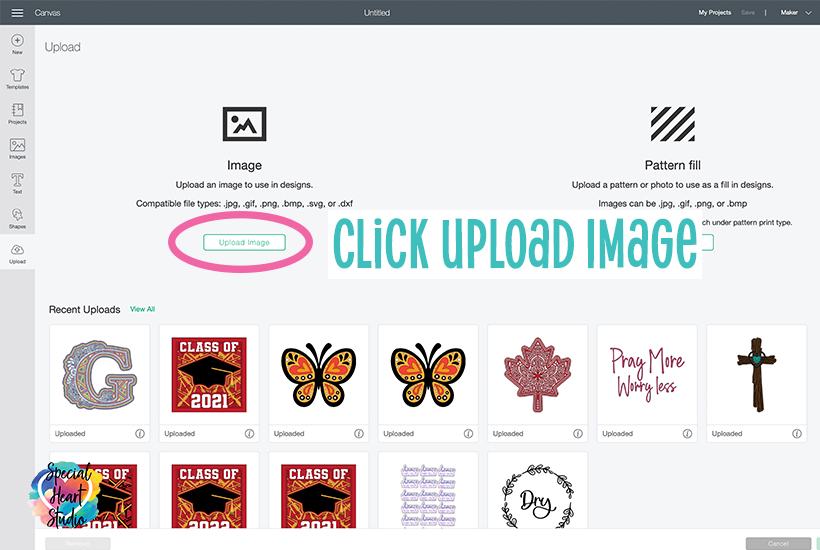
Next click Upload Image
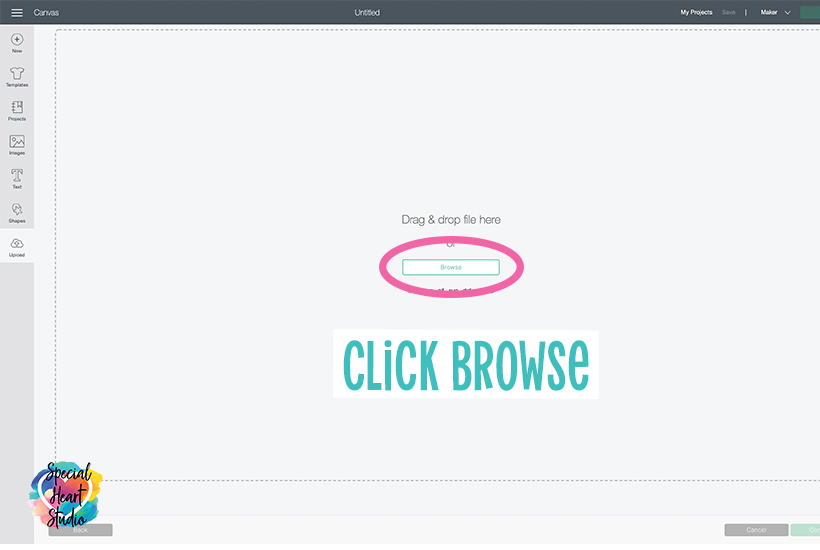
On this screen, you may either drag & drop the design OR click Browse.
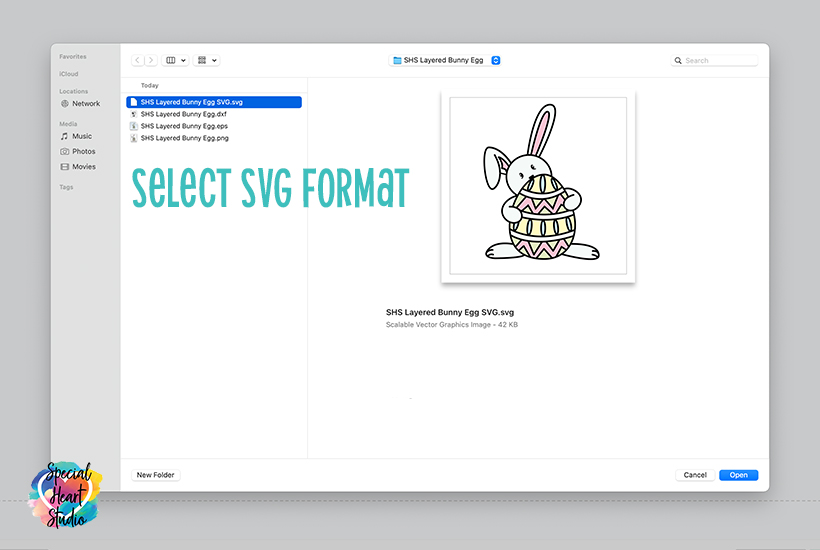
Navigate to where you’ve saved the downloaded and unzipped file. Then highlight the SVG format version of the design and click Open.
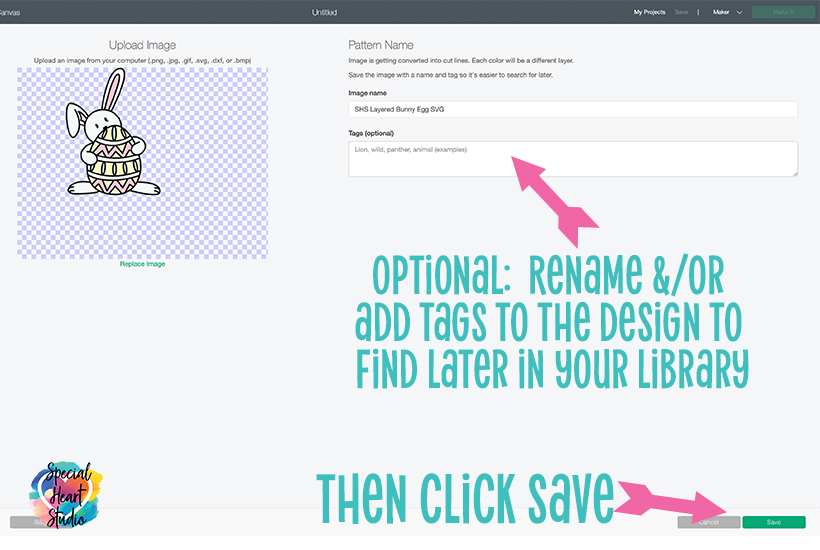
On this screen, you may change the name of the image and add tags for easy searching in your Cricut library of designs later. Then click Save.
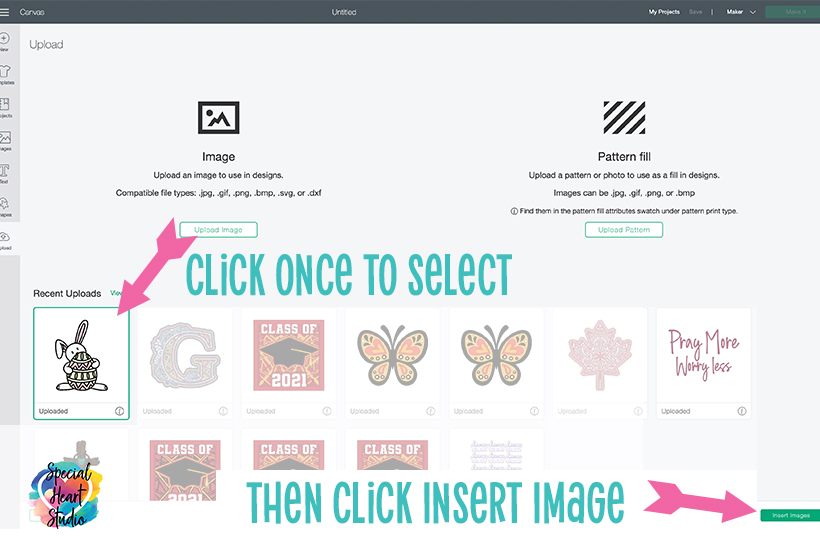
Design Space will return to the Upload image screen. Highlight the newly added Layered Bunny design by clicking once, then click Insert Image.
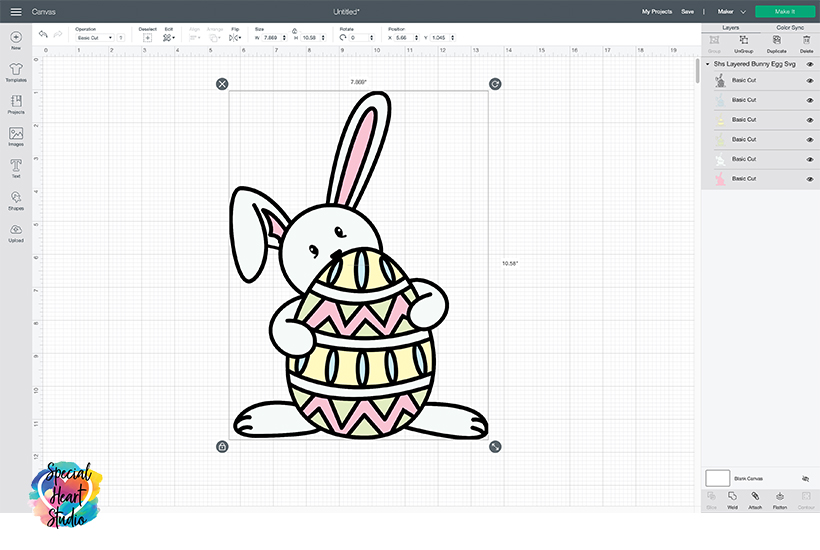
Now that we’re back on the design canvas, you may resize the design and change the layer colors to closely match the colors you’ll use. Then you’re ready to click Make It!
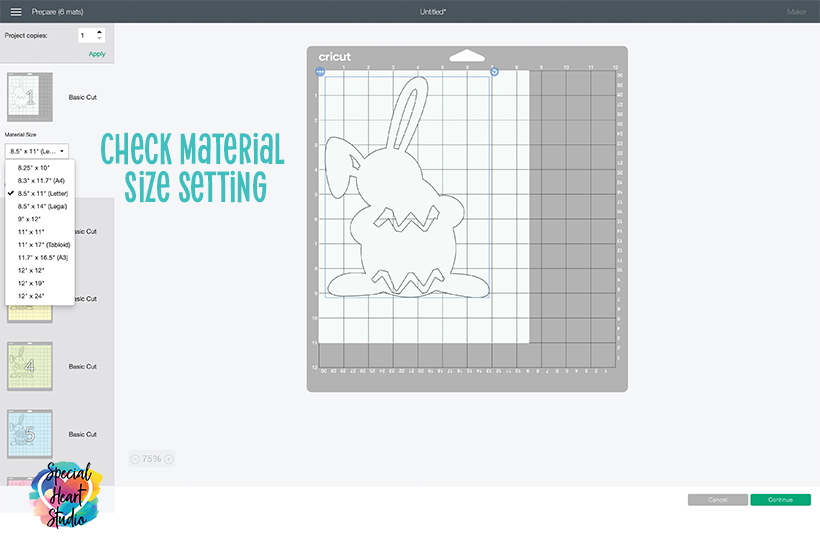
Next select the material size to match your cardstock or material. Click Continue.
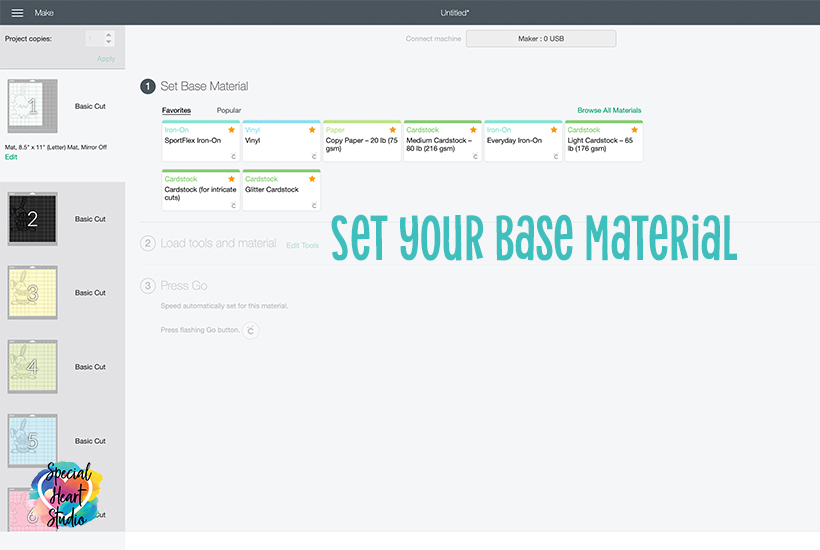
The last part of setting up the design to cut is to select your base material. I used Recollections 65lb. cardstock for my project and have found on my Maker that it cuts perfectly when I use the Light Cardstock setting. Not all settings work the same for each machine, you may need to play around with test cuts to find what works best for your machine and blade.
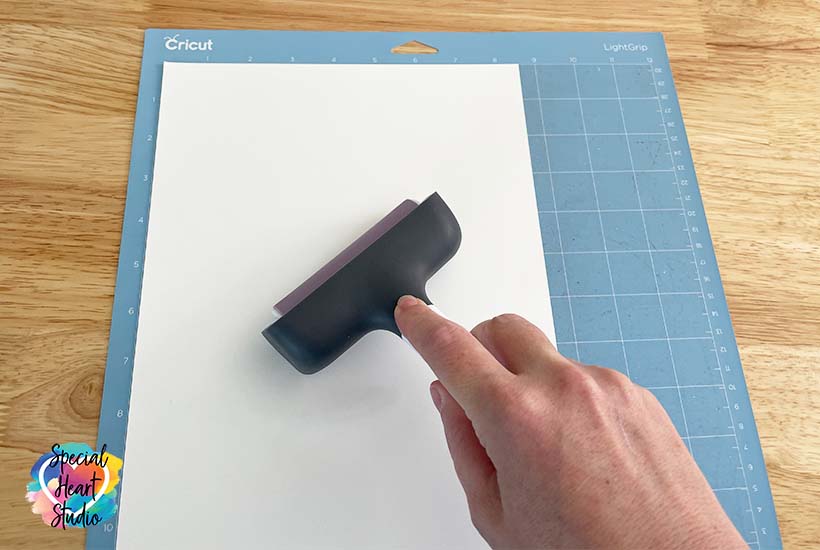
Using a brayer to firmly adhere the cardstock to the mat will greatly reduce tearing.
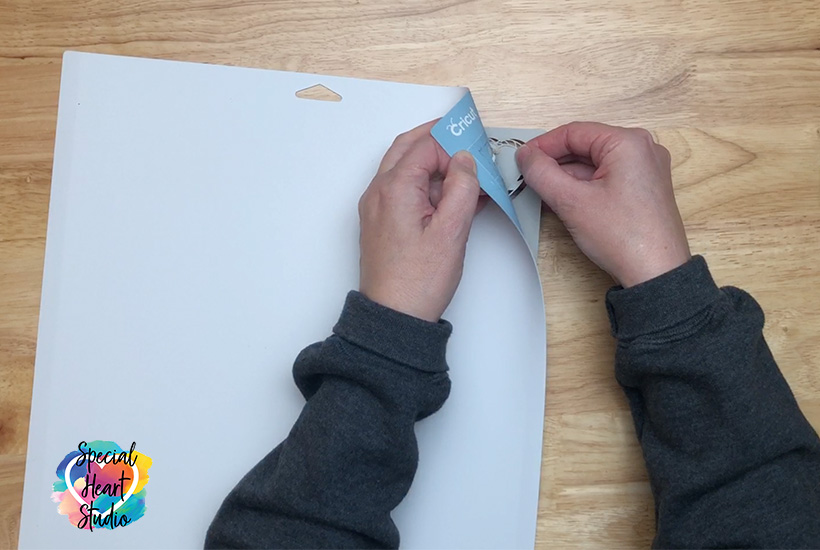
To remove cut cardstock from the mat while reducing tearing and curling, turn the mat upside down with the mat on your worksurface, remove the mat from the paper. Gently bend the mat back while keeping the paper as flat to your work surface as possible.
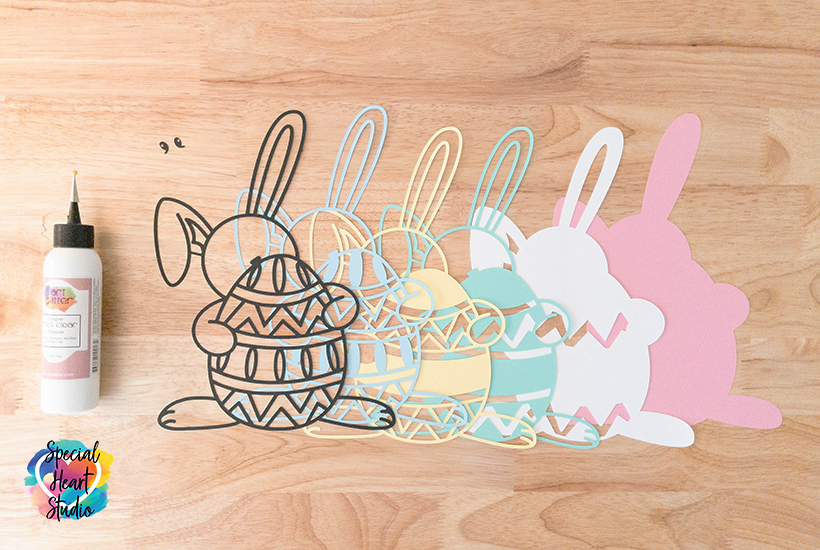
Once you have all the layers cut, you’re ready to glue them together. I recommend starting with the bottom layers and working up for this design. I used Art Glitter Glue to adhere the first couple of layers. Then switched to using spray adhesive for the last intricate top layers.
Please Share Prior To Downloading
Please share! If you enjoy this project/design, please share it on your social media platform or your favorite Pinterest board. I greatly appreciate it!! That helps my blog continue to grow and enables me to continue to provide free designs. 💕 Thank you!
Download My FREE Layered Bunny Egg Cut File By Subscribing Below To Get The Password To My Freebie Vault
DOWNLOAD the Layered Bunny Egg– Design #126 by entering the password to my Freebie Vault. Click HERE to go to the freebie vault, my library of free downloads. To sign up for a password to my free designs, enter your name and email address below. ⬇️
New to Design Space and looking for help with how to upload? Click HERE to find directions to get started.

this is so adorable thank you
Thank you so much for the adorable file, you are very creative and generous. I love the bunny and egg, it will look so cute with an Easter banner.
Love this site already did the bunny and egg put it together a little different but love it thank you so much Ann marie clarke
Your designs are so cute. Thank you for sharing!
You really should do little meet & greet @ a craft store, That is after the “wonderful pandemic” is all clear. I have thought to myself on sooo many occasions while watching a tutorial, I’d really like to know this lady!! Your so talented and very kind, I think you must have an amazing personality!! Please, keep me in mind should you do it.🙏 With your guidance and wisdom, you’ve probably really touched so many hearts, I know you have mine. Thankfully,
You are so sweet. Thank you. 🥰 I can be terribly shy, but that does sound a bit fun to get to actually meet those who like to use my designs. Hopefully, soon we can get out and socialize. ❤️
Just finished this file this morning, along with one of the butterflies. I will use them as my front porch “welcome” sign for the month of April. I made these from plastic school folders and used Gorilla glue to adhere the layers. I’ve found that this combination holds up well outside on my covered front porch. Fewer color choices, mostly primaries and brights, but that’s ok! The files both cut beautifully and went together easily. If I were a bit more coordinated myself, they’d be perfect!
Such a great idea for using these types of designs outside. I saw the photo you posted of them, just gorgeous. Thanks for sharing. ❤️
I made this design last week and love it. Cannot wait to make the layered chick that goes with it. Thank you so much for sharing such fun projects!
I just love your creations! Thank you so much for sharing all these great projects!