HOW TO CUT AND ASSEMBLE A LAYERED FOOTBALL HELMET

This post may contain affiliate links. Please see my Privacy Policy for full details.

I absolutely love football. Earlier this week someone was looking for a football helmet and outreached as I’d previously designed a bundle of layered sports balls including a football, so they were wondering if I had a helmet. I had to drop everything and create this one!
Wouldn’t the two of the designs look great together too? I can picture these as decor for a boy’s room.
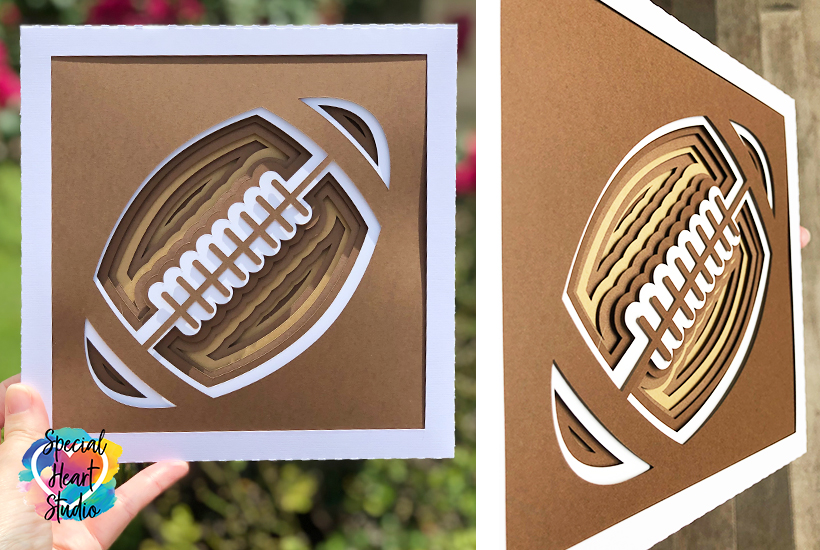
If you’re looking for the football to go along with the helmet, click HERE.
I don’t mind if you use these designs for personal or small business commercial use up to 200 items, but please do not re-sell or re-distribute the files. I’d ask that you direct your crafty friends here to download the files themselves. Also, I don’t allow my designs to be used in print-on-demand shops or on transfers that will be sold. Click HERE for complete Terms of Service.
MATERIALS NEEDED TO MAKE A LAYERED FOOTBALL HELMET
- 65 lb Cardstock – I used eight sheets of 8.5×11 Recollections Cardstock.
- Art Glitter Glue
- Foam tabs – These foam tabs from Tombow are my absolute favorite. They’re thick enough to provide a good dimension to each project.
- Brayer
- Light grip mat (blue light grip)
- Cricut Maker – or your favorite cutting machine.
- Design #112 – Layered Football Helmet SVG – The free cut file (available in my freebie vault—get the password at the bottom of this post).
HOW TO CUT AND ASSEMBLE A LAYERED FOOTBALL HELMET
Download the free SVG from my Freebie Vault. Unzip the download folder, then upload the SVG to Design Space. If you need help with how to upload, click here.

I cut (and saved) the helmet at 9.179″ wide x 8″ tall. This way I was able to use 8.5″x11″ paper. Of course you can resize to fit your needs.
Once you’ve set the colors you’ll use and the size you’d like to cut the design, you’re ready to “Make It“

Design Space can sometimes waste materials when the shape appears bigger than it is as the software “sees” it in a square or rectangle space. In this case, there is room to move some of the pieces in order to save a couple sheets of paper.
To consolidate layers, click on the mat where the piece you’d like to move, then right-click the piece. You can then select “Move Object“.

Select a mat with space for the piece you’re moving. Once placed on the new mat, you will probably need to move the piece so that it’s not overlapping or touching any other pieces.

I frequently cut the Recollections Paper on Light cardstock setting, but because my blade is starting to dull, this time I’ve used Medium Cardstock. You may need to do a test cut to determine which setting works for your machine and paper.

Use a brayer to make sure the paper is on the mat securely will reduce tears while cutting.

Once cut, flip the mat upside down and slowly bend the mat back away from the paper while keeping the paper as flat as possible on your work surface.

I suggest using foam tabs to attach the face mask piece first as this piece will be used as a guide in the next steps.

Next, prepare to glue the bottom of the color layers on the helmet. I placed all the pieces on the base prior to gluing so that I knew how they should fit.

Once the bottom pieces were all glued, it’s time to start building dimension, by adding the remainder of the helmet layers. I attached all remaining layers using Tombow Foam Tabs.

That’s it! There’s plenty of space to add your favorite players name, number or team info.

VIDEO TUTORIAL
Below is a video tutorial where I’ll walk you through cutting and assembling the Layered Football Helmet.
PLEASE SHARE PRIOR TO DOWNLOADING
Please share! If you enjoy this project/design, please share it on your social media platform or your favorite Pinterest board. I greatly appreciate it!! That helps my blog continue to grow and enables me to continue to provide free designs. 💕 Thank you!

DOWNLOAD MY LAYERED FOOTBALL HELMET BY SUBSCRIBING (FREE) BELOW TO GET THE PASSWORD TO MY FREEBIE VAULT
DOWNLOAD my Layered Football Helmet SVG Cut file by entering the password to my Freebie Vault. Click HERE to go to the freebie vault, my library of free downIoads. To sign up for a password to my free designs, enter your name and email address below. ⬇️
Thank you! I see you made it in Iowa State colors!
You’re welcome! Yes, I sure did. But was having troubles with the color settings so some of them look a bit distorted. That’s ok. I now have it in my craft room and can certainly tell it’s the right colors. ❤️💛❤️💛❤️
I made 3 today to give as gifts. I framed them and added lights and they turned out amazing! I put a photo on your Facebook page! Thanks for sharing these!
You’re welcome! I’ll have to look for the photo, I’ve not seen it yet. 🥰 Merry Christmas!
This is amazing. Any chance of getting a hockey helmet and a hockey goalie helmet?
I have one in the house who plays ball but the rest play hockey!
If you could that would be amazing
Hmmmmm I’m always looking for ideas. I’ll have to see what I can come up with.
love this! I have a question tho, where did you get the glue? I clicked on the link above but it sent me to a spray adhesive and not the glue you were using.
Thanks!
Hi Stacy,
I must have added an incorrect link. I’m so sorry for the trouble. I’ve updated the post and link now, I purchase the glue on Amazon.