LAYERED GRADUATION SHADOW BOX FREE CUT FILE


This post may contain affiliate links. Please see my Privacy Policy for full details.

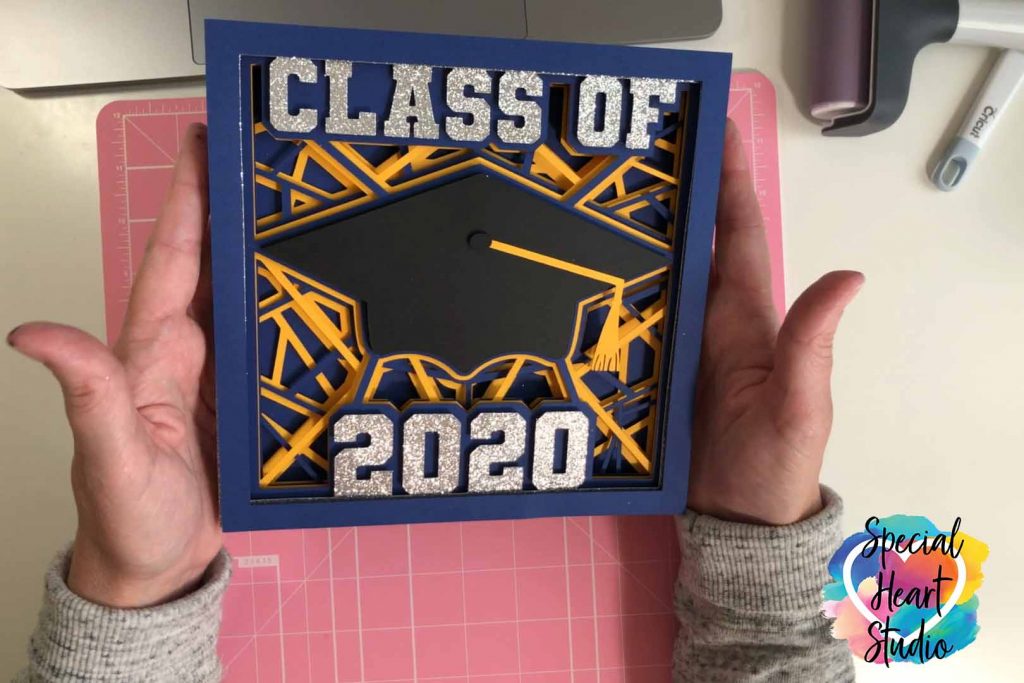
The graduation season is upon us. It may look and feel a bit different this year in parts of the country due to quarantine, but it’s still a massive accomplishment for the graduates and deserves celebration. In my Facebook group, I had a request for a graduation cap mandala. Well, this can’t be called a mandala, but I did come up with a fun layered Class of 2020 design that is perfect for a shadow box.
UPDATE: After multiple requests to add more years to the design, we’re now up to the Class of 2033. Yikes, that sure makes me feel old but will get everyone that is now Pre-K and up covered. 😊

I don’t mind if you use these designs for personal or small business commercial use up to 200 items, but please do not re-sell or re-distribute the files. I’d ask that you direct your crafty friends here to download the files themselves. Also, I don’t allow my designs to be used in print-on-demand shops or on transfers that will be sold. Click HERE for complete Terms of Service.
HOW TO MAKE A LAYERED GRADUATION SHADOW BOX
Although the end project looks complicated, it’s relatively simple. Follow the below-outlined steps and video to see how I assembled the shadowbox.

MATERIALS NEEDED FOR LAYERED GRADUATION SHADOW BOX
- 65lb. Cardstock – I prefer the Recollections brand.
- Foam Tabs – These are my favorite. I’ve found they provide more depth between the layers. Also note, the Amazon photo shows the package includes 50 tabs. It’s really 464. There are 50 large pieces, and 414 small sizes.
- Zots
- Square Shadow Box – For this project (pictured). I used an 8-inch square shadow box for the blue frame and a 9-inch square shadow box for the red project. Both frames I purchased from Michael’s.
- Light Grip Mat (blue)
- Brayer
- Cricut Maker – or cutting machine of your choice
- Design #53 – Layered Graduation Shadow Box SVG – My free SVG cut file (available in my freebie vault—get the password at the bottom of this post).

DETERMINE THE CUT AND PAPER SIZE
To get started, you’ll need to measure the inside dimensions of your frame. For the pictured shadow boxes, I cut the blue design at 7.53 inches to fit the 8-inch shadow box. If using an 8-inch shadow box, you will be able to use 8.5×11″ paper.
For the 9-inch (red) shadow box, I set the project to cut at 8.53 inches. This project required the use of 12×12″ square paper.

Using a brayer when placing the card stock on will help keep the paper from ripping and also keeps oils from your hands being transferred to the material. I skipped this step when I first started working with my machine, not realizing that it does help. Cut all of the layers and set aside. Note: there will be two graduation caps.
REMOVE MAT FROM PAPER
One of the questions I most often receive from people on paper projects is how to get the paper off the mat without tearing it. I’ve found the most success by laying the mat upside down on my desk and slowly bending the cutting mat away from the paper. I frequently use my hand or a ruler to hold the paper in place.

Once all the cuts are complete and removed from the mat, you’re ready to start assembly. I started by adhering the two mortarboards together using Zots. Foam tabs would also work to provide height to the project.
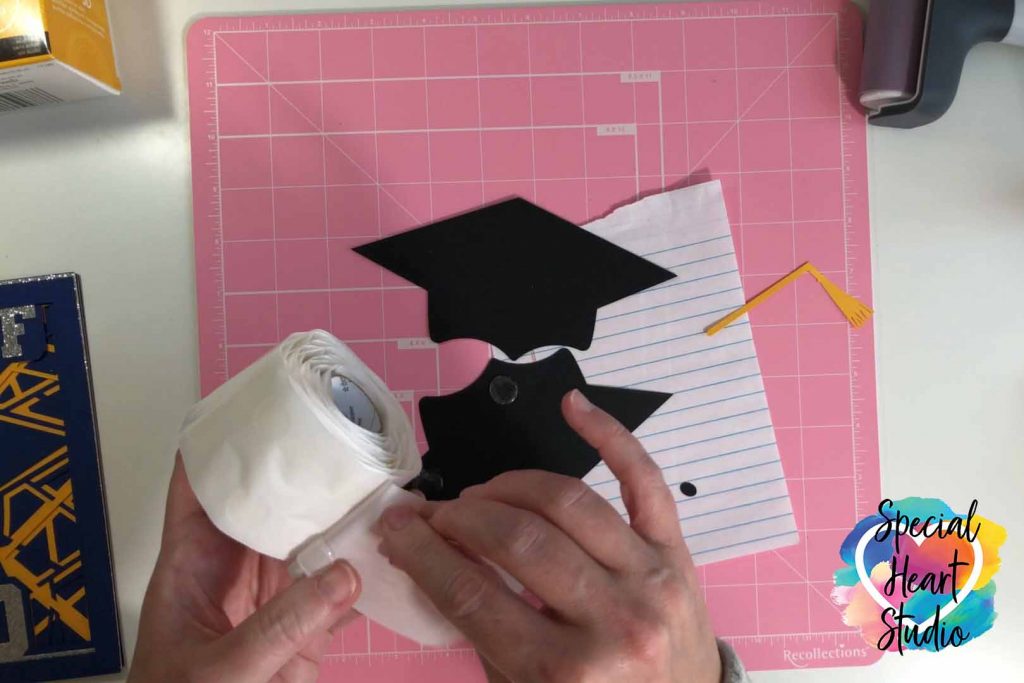
Next, glue the tassel to the hat, making sure to take note of the right direction as the other layers. (The mortarboard is not symmetrical). To complete this step, attach the button using a foam tab and place it on top of the tassel string. My foam tab was almost the same size as the oval button, so I took a black marker and colored it so that the white wouldn’t show.
Add tabs between each of the layers. I’ve found it easiest to start working in reverse. Line up the project by removing the back of a few of the foam tabs, place them evenly, and then remove the remainder then adhere. The video (below) explains this process in more detail.
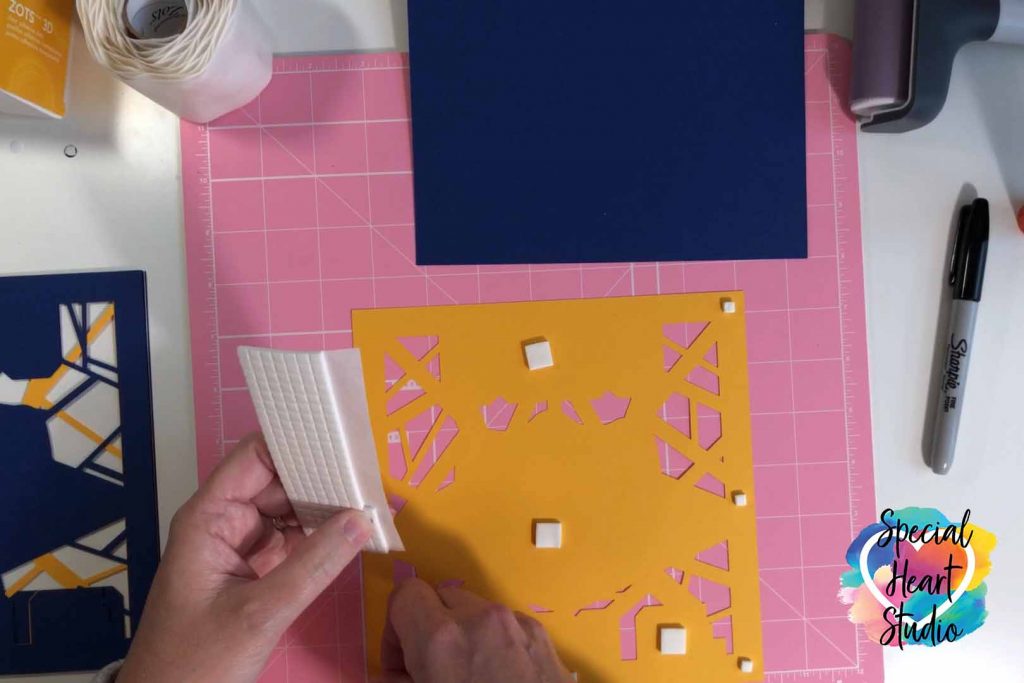
Continue to placing foam tabs between all the layers.
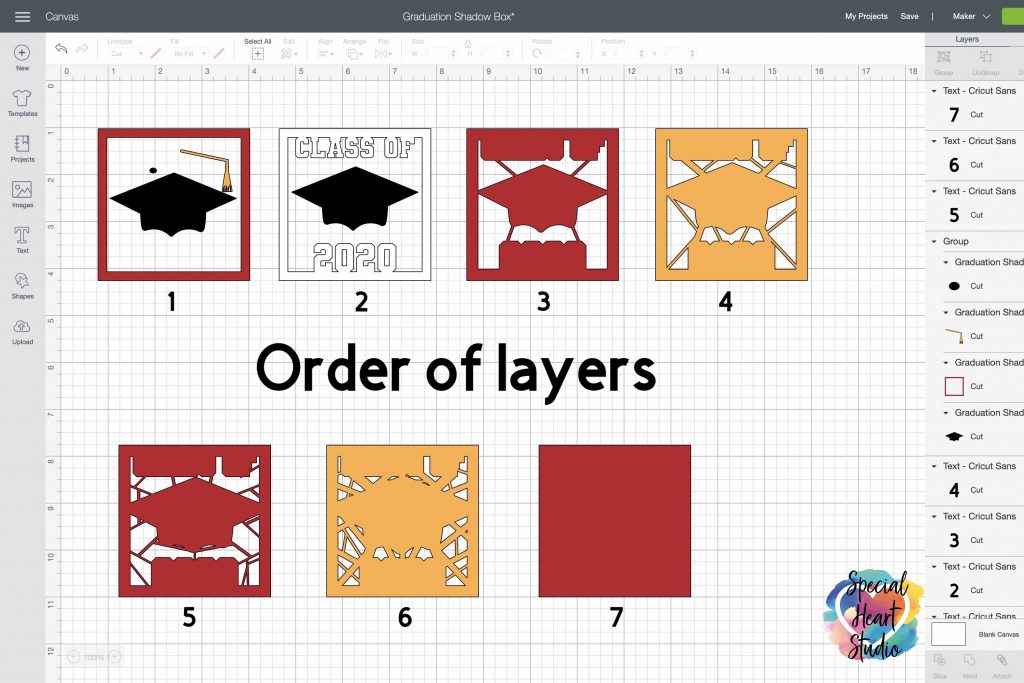
Once all the square layers are in place, the last step is to attach the graduation hat.
VIDEO TUTORIAL ASSEMBLING THE LAYERED GRADUATION SHADOW BOX
SHARE PRIOR TO DOWNLOADING
Please share! If you enjoy this project/design, please share it on your social media platform or your favorite Pinterest board. I greatly appreciate it!! That helps my blog continue to grow and enables me to continue to provide free designs. 💕 Thank you!
NEED A SHADOW BOX FRAME?
If you’re looking to make a frame for the shadow box out of card stock or kraft board, this link will take you to my free Shadow Box SVG (and a layered mandala too).
Download My FREE Layered Graduation Shadow Box SVG Files By Subscribing Below To Get The Password To My Freebie Vault
DOWNLOAD the Layered Graduation Shadow Box SVG Cut Files – Design #53 by entering the password to my Freebie Vault. Click HERE to go to the freebie vault, my library of free downloads. To sign up for a password to my free designs, enter your name and email address below. ⬇️
New to Design Space and looking for help with how to upload? Click HERE to find directions to get started.
CHECK OUT SOME OF MY RECENT POSTS
- Using Midjourney for Crafts: A New Age of Digital Artistry
- Creative Fabrica’s CF Spark: Your New AI Buddy for Cool Craft Projects
- Cricut Craft Adventure Giveaway
- Cricut Adventure
- Cricut Craftfest Giveaway
WANT TO REMEMBER THIS?
PIN LAYERED GRADUATION SHADOW BOX CUT FILE TO YOUR FAVORITE PINTEREST BOARD.

You’re so welcome. Congratulations to your daughter.
Thank you so much
I love this graduation file. My daughter graduates college next year. do you think you will make a 2021 one. I would love to make this for her
Hello Holly, I’m delayed responding to comments. I have updated the design to include 2021-2029.
Thank you! Can you instruct me on how to get the 2021 version? I can’t seem to find it. It’s only 2020.
Hi Shannon, The download includes the years 2020-2033. Would you mind double-checking your download folder? If you don’t find it, let me know and I’ll have to do some troubleshooting.
Thank you so much for sharing this! I just made this for my daughter who is gradating from high school in a few weeks! It was very easy to make, thanks to your detailed instructions. Thanks!
Thank you
Love this and the fact that you included several years. Got both grandsons covered! Thank you
I love this grad shadow box (thank you)and I am making one for my grandson. I am thinking that I would like to add his name on the cap so what font did you use? Thank you again for all you do for us crafters.
Hi Lynette,
The font in this design is called Varsity Team Sport. You can find it on FontBundles through my affiliate link: https://fontbundles.net/donmarciano/292940-varsity-team-sports-font/rel=VTJ6Og
Thank you for sharing your files. very excited to try them xx
Can i use a 12×12 shadow box if my paper is 12×12? or do i need to get a smaller box?
I’ve found many of the frames the “inside” size can vary, so hard to know without seeing your frame. I’d recommend measuring the inside portion of your frame and decide from there. Remember the Cricut will only actually cut 11.5×11.5″.
Gjoa
I am getting frustrated with uploading this Grad File, You said if you don’t see each individual layer then you have the wrong file, but I have tried all of them! It is also not just your site that is like this, but can you please help me, I want to make this as a gift for a friend who is graduating this year! Please and thankyou!
Hi Faith, I’d love to help. Could you tell me what machine you’re using?
Hi GJOA i have a cricut maker and when I try and Make your shadow boxes it does not ask for scouring wheel it ask for stylus and does not give me the option to change it, I dont know what Im doing wrong thak you.
There are two different SVG files for the shadow box. One has a perforated cut within the design. That one wouldn’t require scoring. My guess is that’s the one that you’ve uploaded? There should be a scoring version included too.
do we have to edit and create the layers ourselves from the png? not sure how to differ each layer
The SVG format version file will have all the layers separated. You’ll just need to upload the SVG format to your cutting machine software in order to see all the layers.
Thank you so much for the adorable layeted graduation file. I did however notice that the 3rd layer in the cut file for 2021 does not have the notches where the 2021 would lay. Therefore the straight edge covers all the beautiful notches below it. 🙁
Hi Cheryl. Thank you for the feedback. I’ve updated the Class of 2021 design.
Thank you for this design. I have made several graduation cards and they have all been well received.
You’re welcome. 🥰