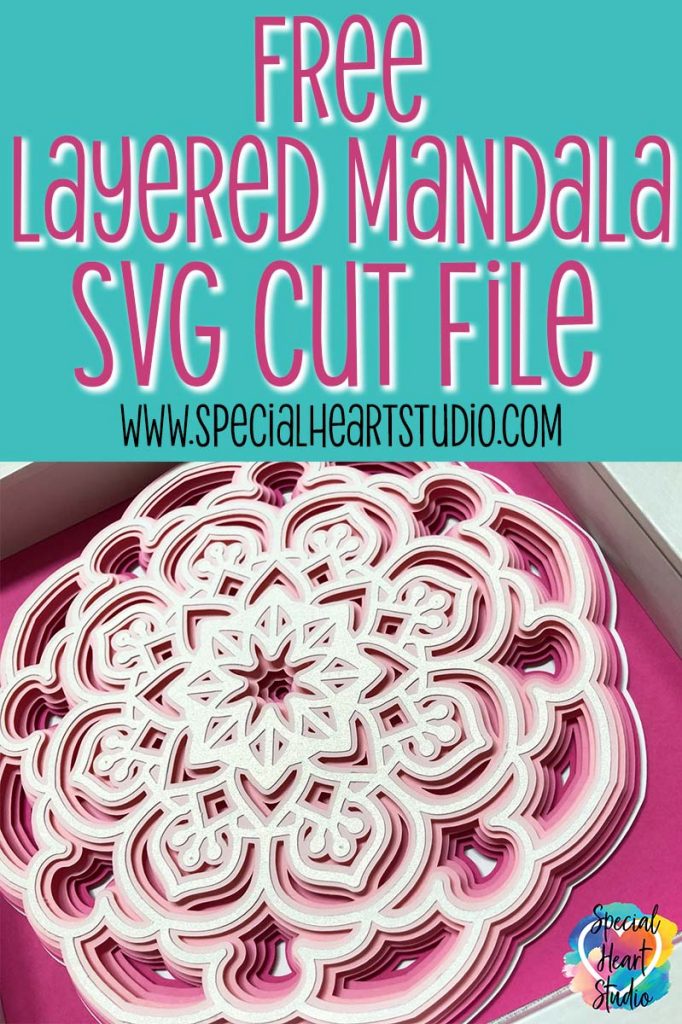
FREE LAYERED MANDALA SVG
This post may contain affiliate links. Please see my Privacy Policy for full details.

LEARN HOW TO MAKE A LAYERED MANDALA WITH CARDSTOCK
All over Facebook craft groups, I’ve seen stunning layered cardstock projects. I was anxious to get in on the fun and try my hand at one too. It was a challenge to design, but I’ve finally completed my first layered mandala. Below you’ll find written step-by-step instructions on how I assembled my project. If you’re interested in a video, be sure to let me know either here in comments, on FB, or email me and I can put one together. Enjoy this layered project. I’d love to see what you do with this one. ❤️
Let’s start with the supplies you’ll need.
MATERIALS NEEDED TO MAKE LAYERED MANDALA PROJECT
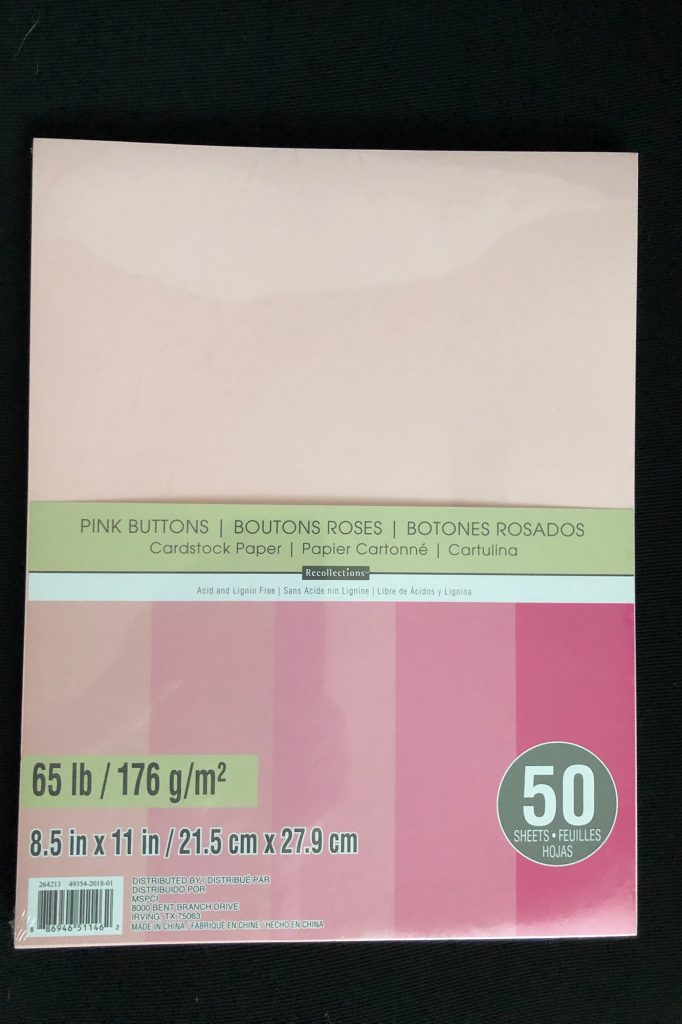
- Cardstock – I used 7 sheets of Reflections brand (Michael’s Store) 65lb 8.5 in. x11 in. cardstock.
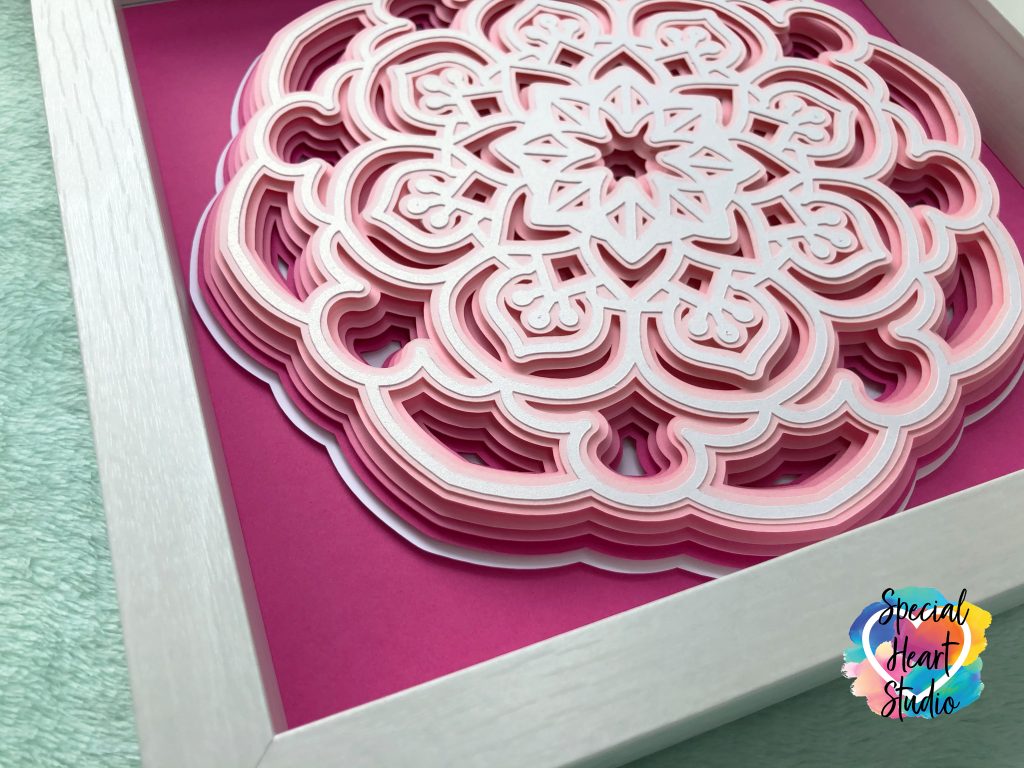
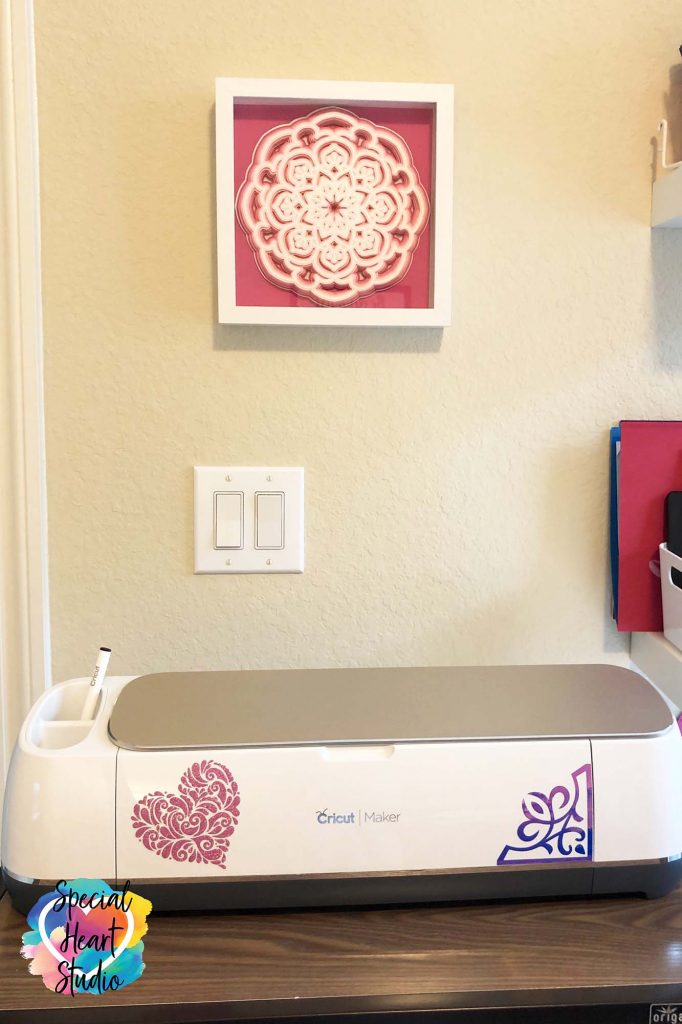
- Shadowbox Frame – I used a 9 in.x 9in. frame from Michaels.
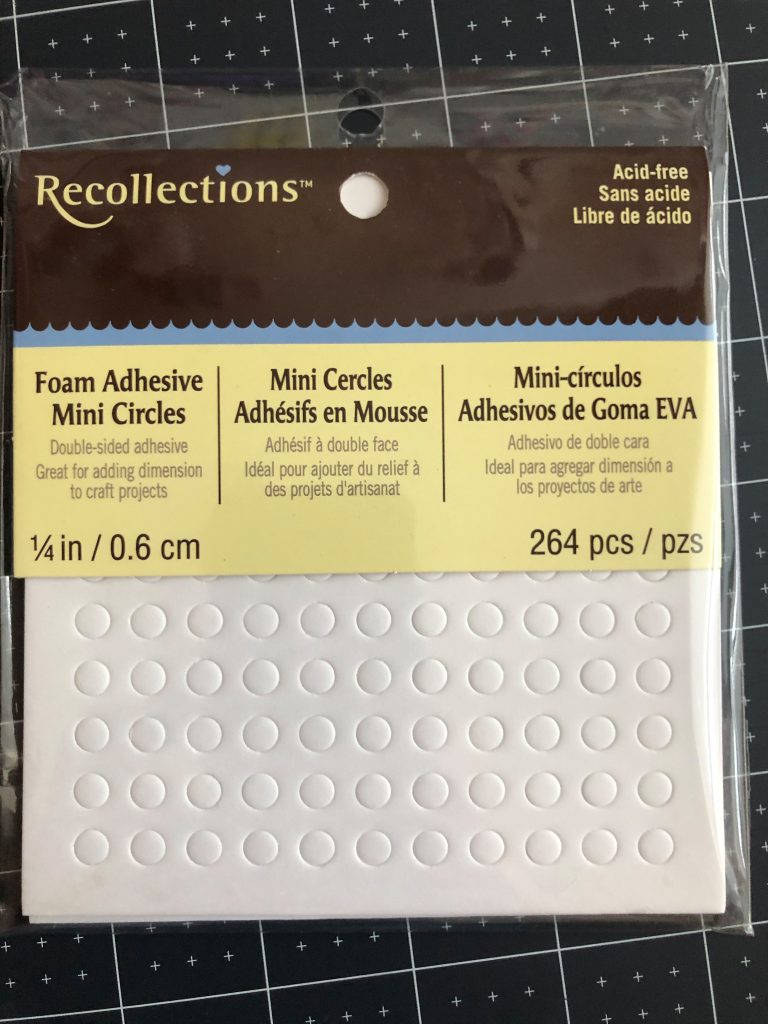
- Glue or Foam Adhesive
- Light Grip Mat (light blue)
- Cricut Machine – I use a Maker which you can find directly from Cricut or Amazon.
LET’S GET STARTED
After you’ve downloaded the design below you’ll want to upload the design to Cricut Design Space. If you need help learning how to upload, please refer to this post.
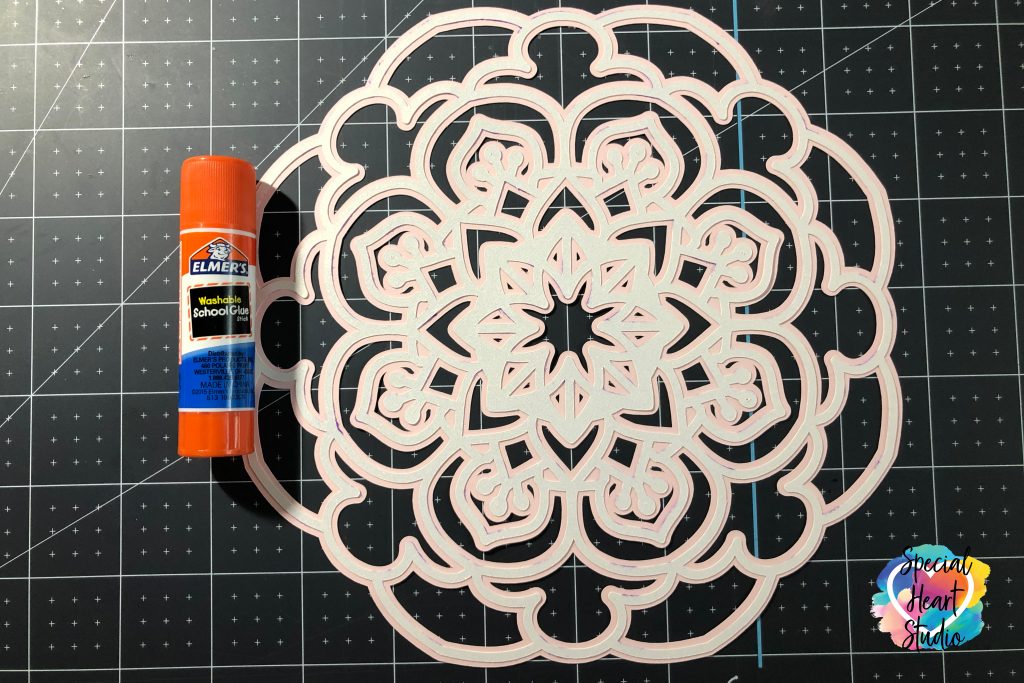
Because my shadow box is 9-inch x 9 inches, I decided to make the width of my project 8 inches in design space. You’ll want to size your project based on your paper size and frame (if using one). Tip – the smaller the design, the more challenging to get it off the mat without ripping. I used the Light Cardstock – default pressure setting with the fine point blade to cut the cardstock. If your paper rips, try sharpening your blade by poking it into a piece of balled up aluminum foil a few times. That will sharpen and clean your blade.
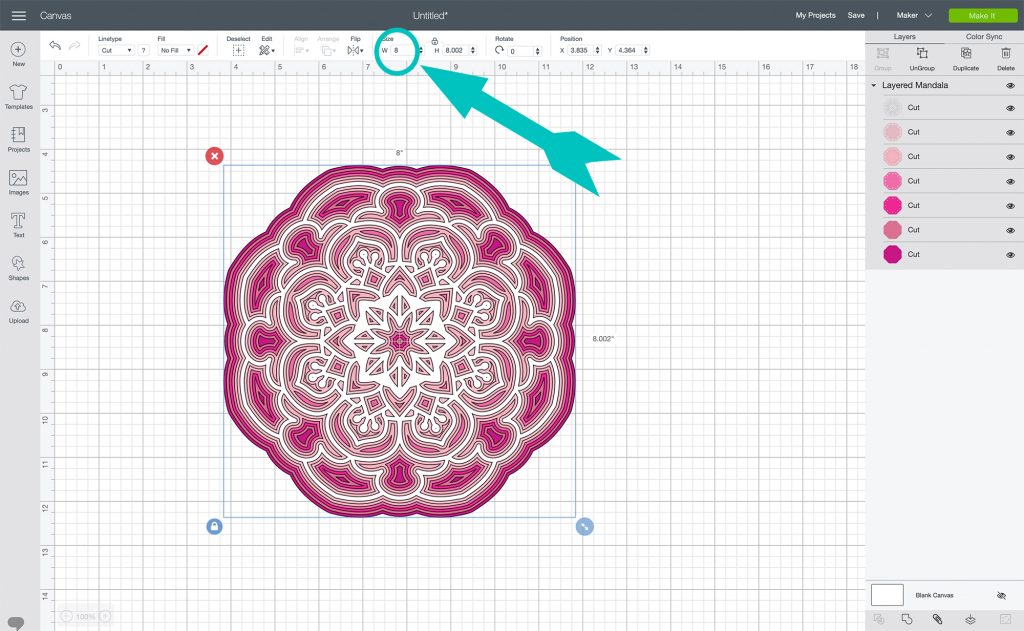
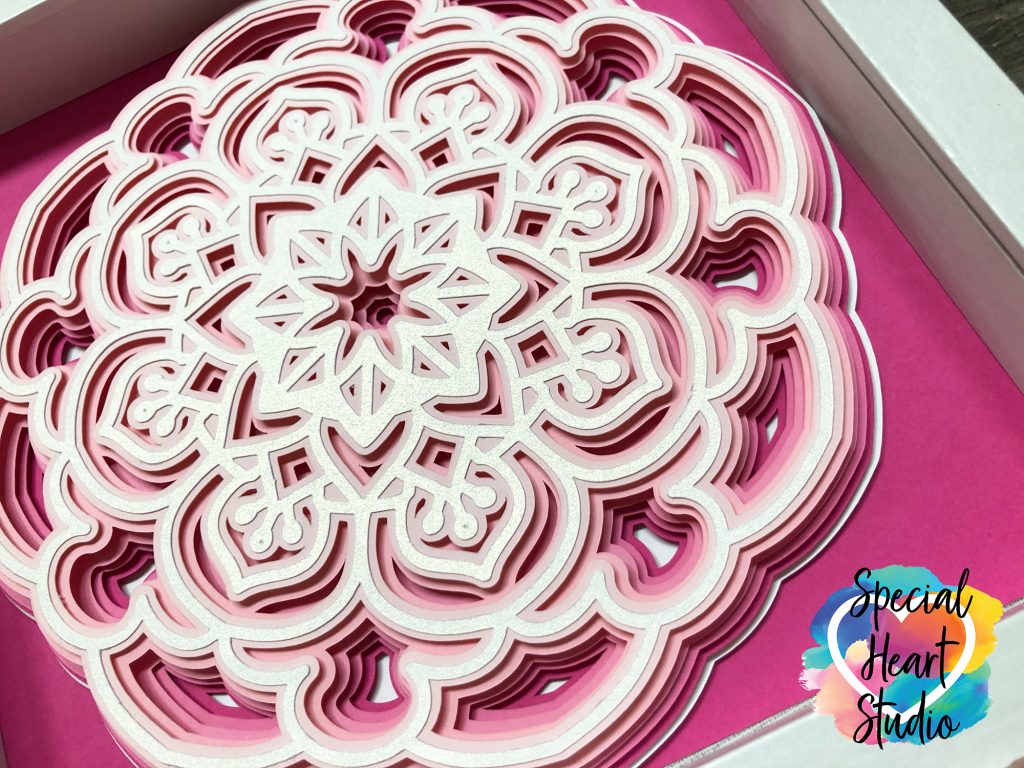
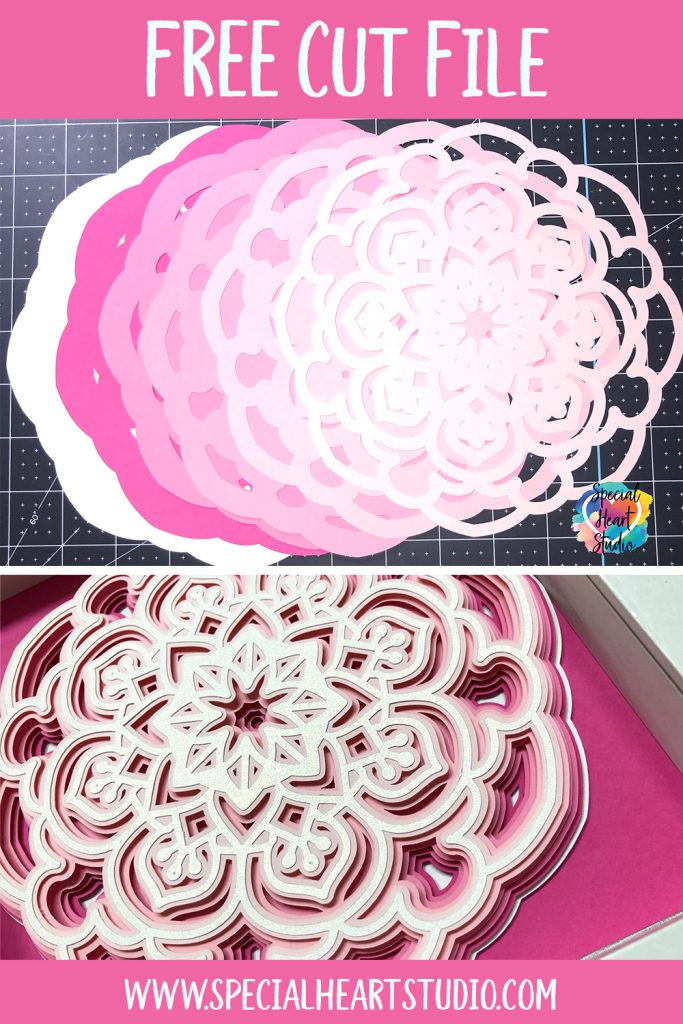
There are seven layers to this design. If you’re wanting to simplify it a bit, I would leave out the 2nd, 4th and 6th layers to reduce it down to just 4 layers.

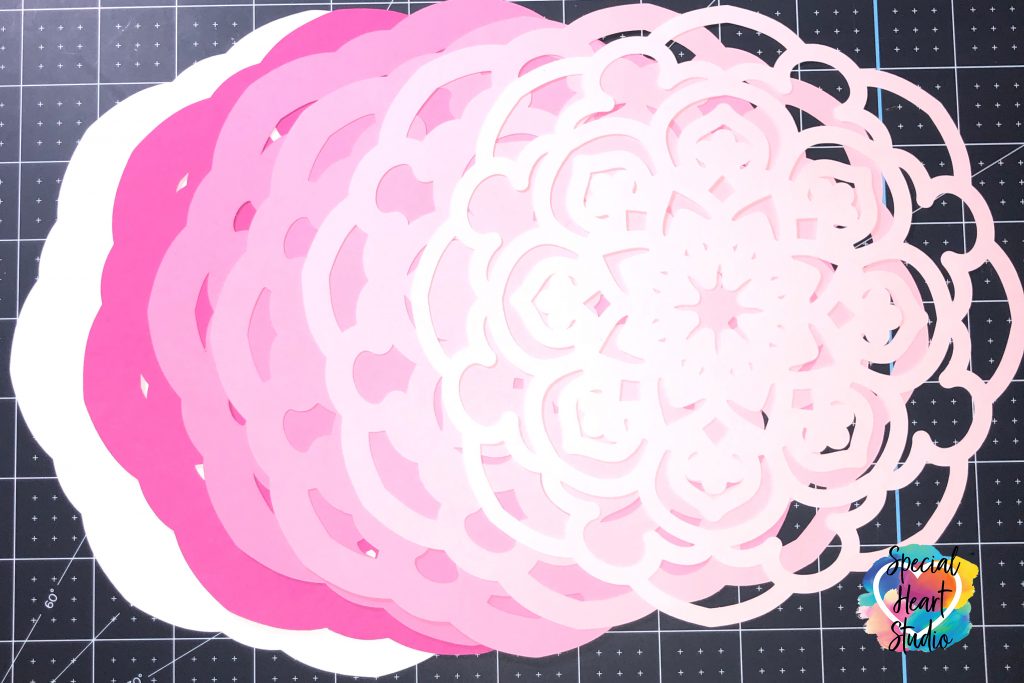
Once the layers that you’d like to use have cut, carefully remove each layer from your mat. I find it easiest to put the paper side face down and slowly bend my mat while peeling the paper toward my desk.
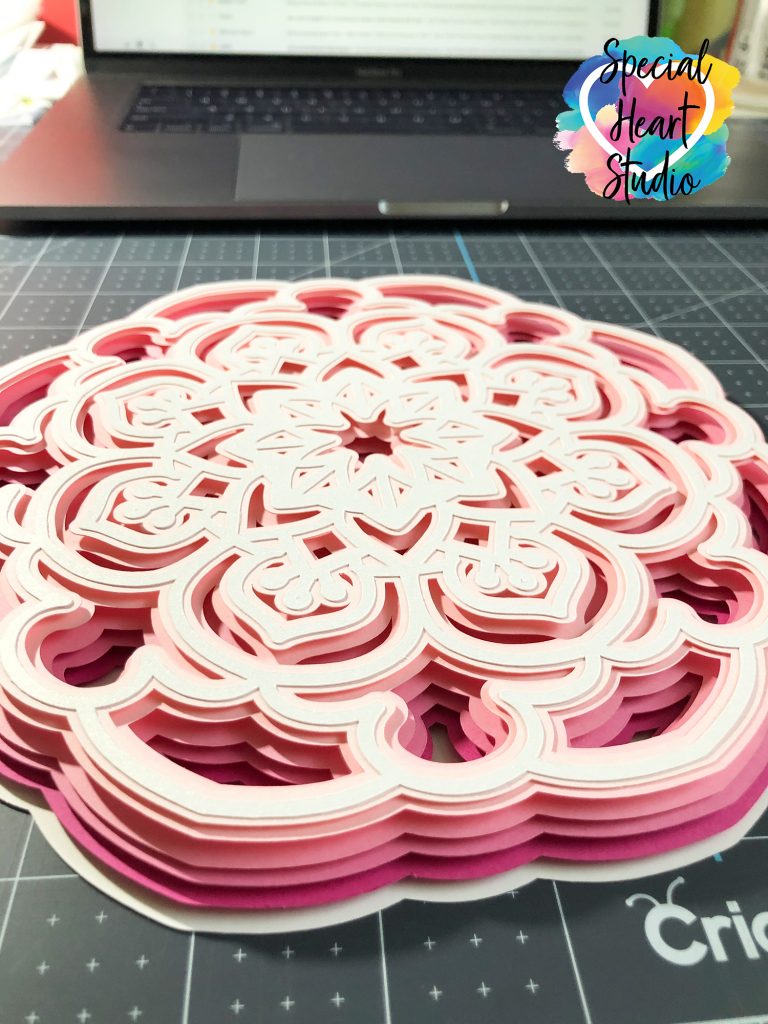
I used a regular school glue stick to glue the very top layer to the second layer. All other layers I carefully lined up one by one and used the foam adhesive tabs to create space between them.

This is the cardstock used in my project. I also used 1 sheet of white and a pearl white the top layer. 
Foam adhesive tabs.
Last step is placing the completed layered mandala in a frame or shadow box.
PLEASE SHARE BEFORE YOU DOWNLOAD
Please share! If you enjoy this project/design would you please share it on your social media platform or to your favorite Pinterest board? I greatly appreciate it!! That helps my blog continue to grow and enables me to continue to provide free designs. 💕 Thank you!
DOWNLOAD THE LAYERED MANDALA SVG HERE:
LOVE FREE DESIGNS AND PROJECT IDEAS?
If you haven’t already, be sure to join our newsletter list. Every Friday, I send out Heart Connection News. Don’t miss out on any of our free designs and new releases! Click here to go to our sign up page. You’ll also receive a free cut file just for signing up. 💜 We also have a Facebook page and group where I post free designs from trusted websites. What are you waiting for? Join today. 💜

WANT TO REMEMBER THIS LATER? PIN FREE LAYRED MANDALA SVG TO YOUR FAVORITE PINTEREST BOARD.
CHECK OUT THESE OTHER POPULAR POSTS
Free Leopard Print Cross Cut File
How to make a sequin flip pillow with Infusible Ink
Free Faith Over Fear Cut File
Sleepover Squad Cut File
WANT TO REMEMBER THIS? PIN FREE 3D LAYERED MANDALA TO YOUR FAVORITE PINTEREST BOARD
Thanj you
Thank you for making this tutorial.
You’re welcome.
How do you make the frame for mandalas
Thank you, it’s stunning!
Would you share how to create 3d mandela’s?
You’re welcome.
To create the 3D effect I first created the mandala in Adobe illustrator and then duplicated and offset the path on each subsequent layer.
Thanks so much for this tutorial and the SVG files! I am a beginner but excited to try this pretty mandala.
You’re welcome. ❤️
Thank you so much for this xx
You’re welcome.
Beautiful! Thanks for the clear directions!
beautiful thank you
Thank you for sharing, it is beautiful.
A good friend directed me to your site – I love the heart that is on your Maker – just wondering where you found the file – it’s so beautiful.. Have a great weekend and stay safe…
Thank you for your kind words. I wish I could remember where I got the heart. It was one of the very first things I did when I got the machine a few years ago.
I love this and your letters. I’ve been looking over it all before I actually do one. Do you have symbols as well? I am wanting to do G & A or G❤️A for my son’s girlfriend
Hi Becky. I do have an ampersand sign that is on the same page as the Capitol letters. I’ve not yet created a heart, but have been thinking about adding one.
Gjoa
This is so fun! I am excited to try it. Thank you for making this!
These are beautiful but I can only use dxf files with the basic silhouette software and I cannot figure out how to separate them to print. Can you do a video using silhouette? And can these be made into dxf files?
Hello. I’ve had a few different members of my Facebook group try different ways with the DXF formatted version. Unfortunately, it seems these files are a bit too complicated to well in DXF format. I did attempt to make a video but quickly gave up. You have to select every cut line that belongs to a single layer and create a compound path. If at all possible, I’d recommend upgrading your Silhouette Studio software to the Designer edition. I wish I had a better answer.
I have upgraded to a Designer especially to use this mandala, I can love ad it to my design space and separate the layers but my machine will not cut the project. Any help? I would love to do this one and many more. Thanks
Hi Ellen,
Here’s link to one of my layered mandala videos where I review exactly how I cut the layered cardstock projects with my Cameo. Hope this helps. https://youtu.be/gZ2jH7Ui-iM
Thank you so much. So glad I found you!!!
You’re so welcome. I’m happy you’re here!
What is the spray adhesive used for?
Hi Katie, I use adhesive spray to attach the very top (most intricate) layer to the second layer. I then used the foam tabs between each of the remaining layers.
Gjoa
Just made the Mandala. It is great thanks!
LOVE this! Thank you! It was my first layered mandala, I did it in shades of grey. It was my first time, had a few bumps along the way and it has some mistakes but I’m very happy with it.
I’m so glad you liked it. The layered projects can be so much fun.
I just cut out the pumpkin mandala. Do the layers coincide with the cuts? In other words, what I’m asking is which two layers I should glue together?
How do I find the Michigan mandala?
Please and thank you Marilyn
Hi Marilyn, You will find all 50 states in one download. It’s listed as #70 in my Freebie Vault or you will find the post on the states here: https://specialheartstudio.com/free-layered-mandala-cut-files-50-states/
I am not new to Cricut and would love to use this SVG for a gift for my mom. However, when I extract the file there is nothing extracted, so SVG no PNG, no nothing. Is there a secret I am missing?
Good morning, All of my downloads include at least an SVG file. If you can provide more info, or send a screenshot to my email, I’m happy to help troubleshoot.